

Eiji Murata, the man behind the brand Main d’Or, is one of the highest rated bespoke shoe makers in the world among people in industry, but still relatively unknown to most shoe interested people. Here’s a substantial buyer’s guide with an order of a pair of semi brogues as a base, where most of what you need to know about Main d’Or is included, among other things lots of pictures from the making.
43-year-old Eiji Murata grew up with a father who worked in the shoe industry, and after working at a shoe factory in the Tokyo shoe district Asakusa, Eiji studied shoe design and manufacturing at a school in the city. One of the teachers at the school was Chihiro Yamaguchi, the Japanese pioneer in the new wave of bespoke shoemakers in the country and founder of the Guild of Crafts brand. Eiji Murata realized that making shoes by hand was how he wanted to spend his life, and that’s exactly what he has done now for 13 years.

Eiji Murata.

Glass cabinet with sample shoes.

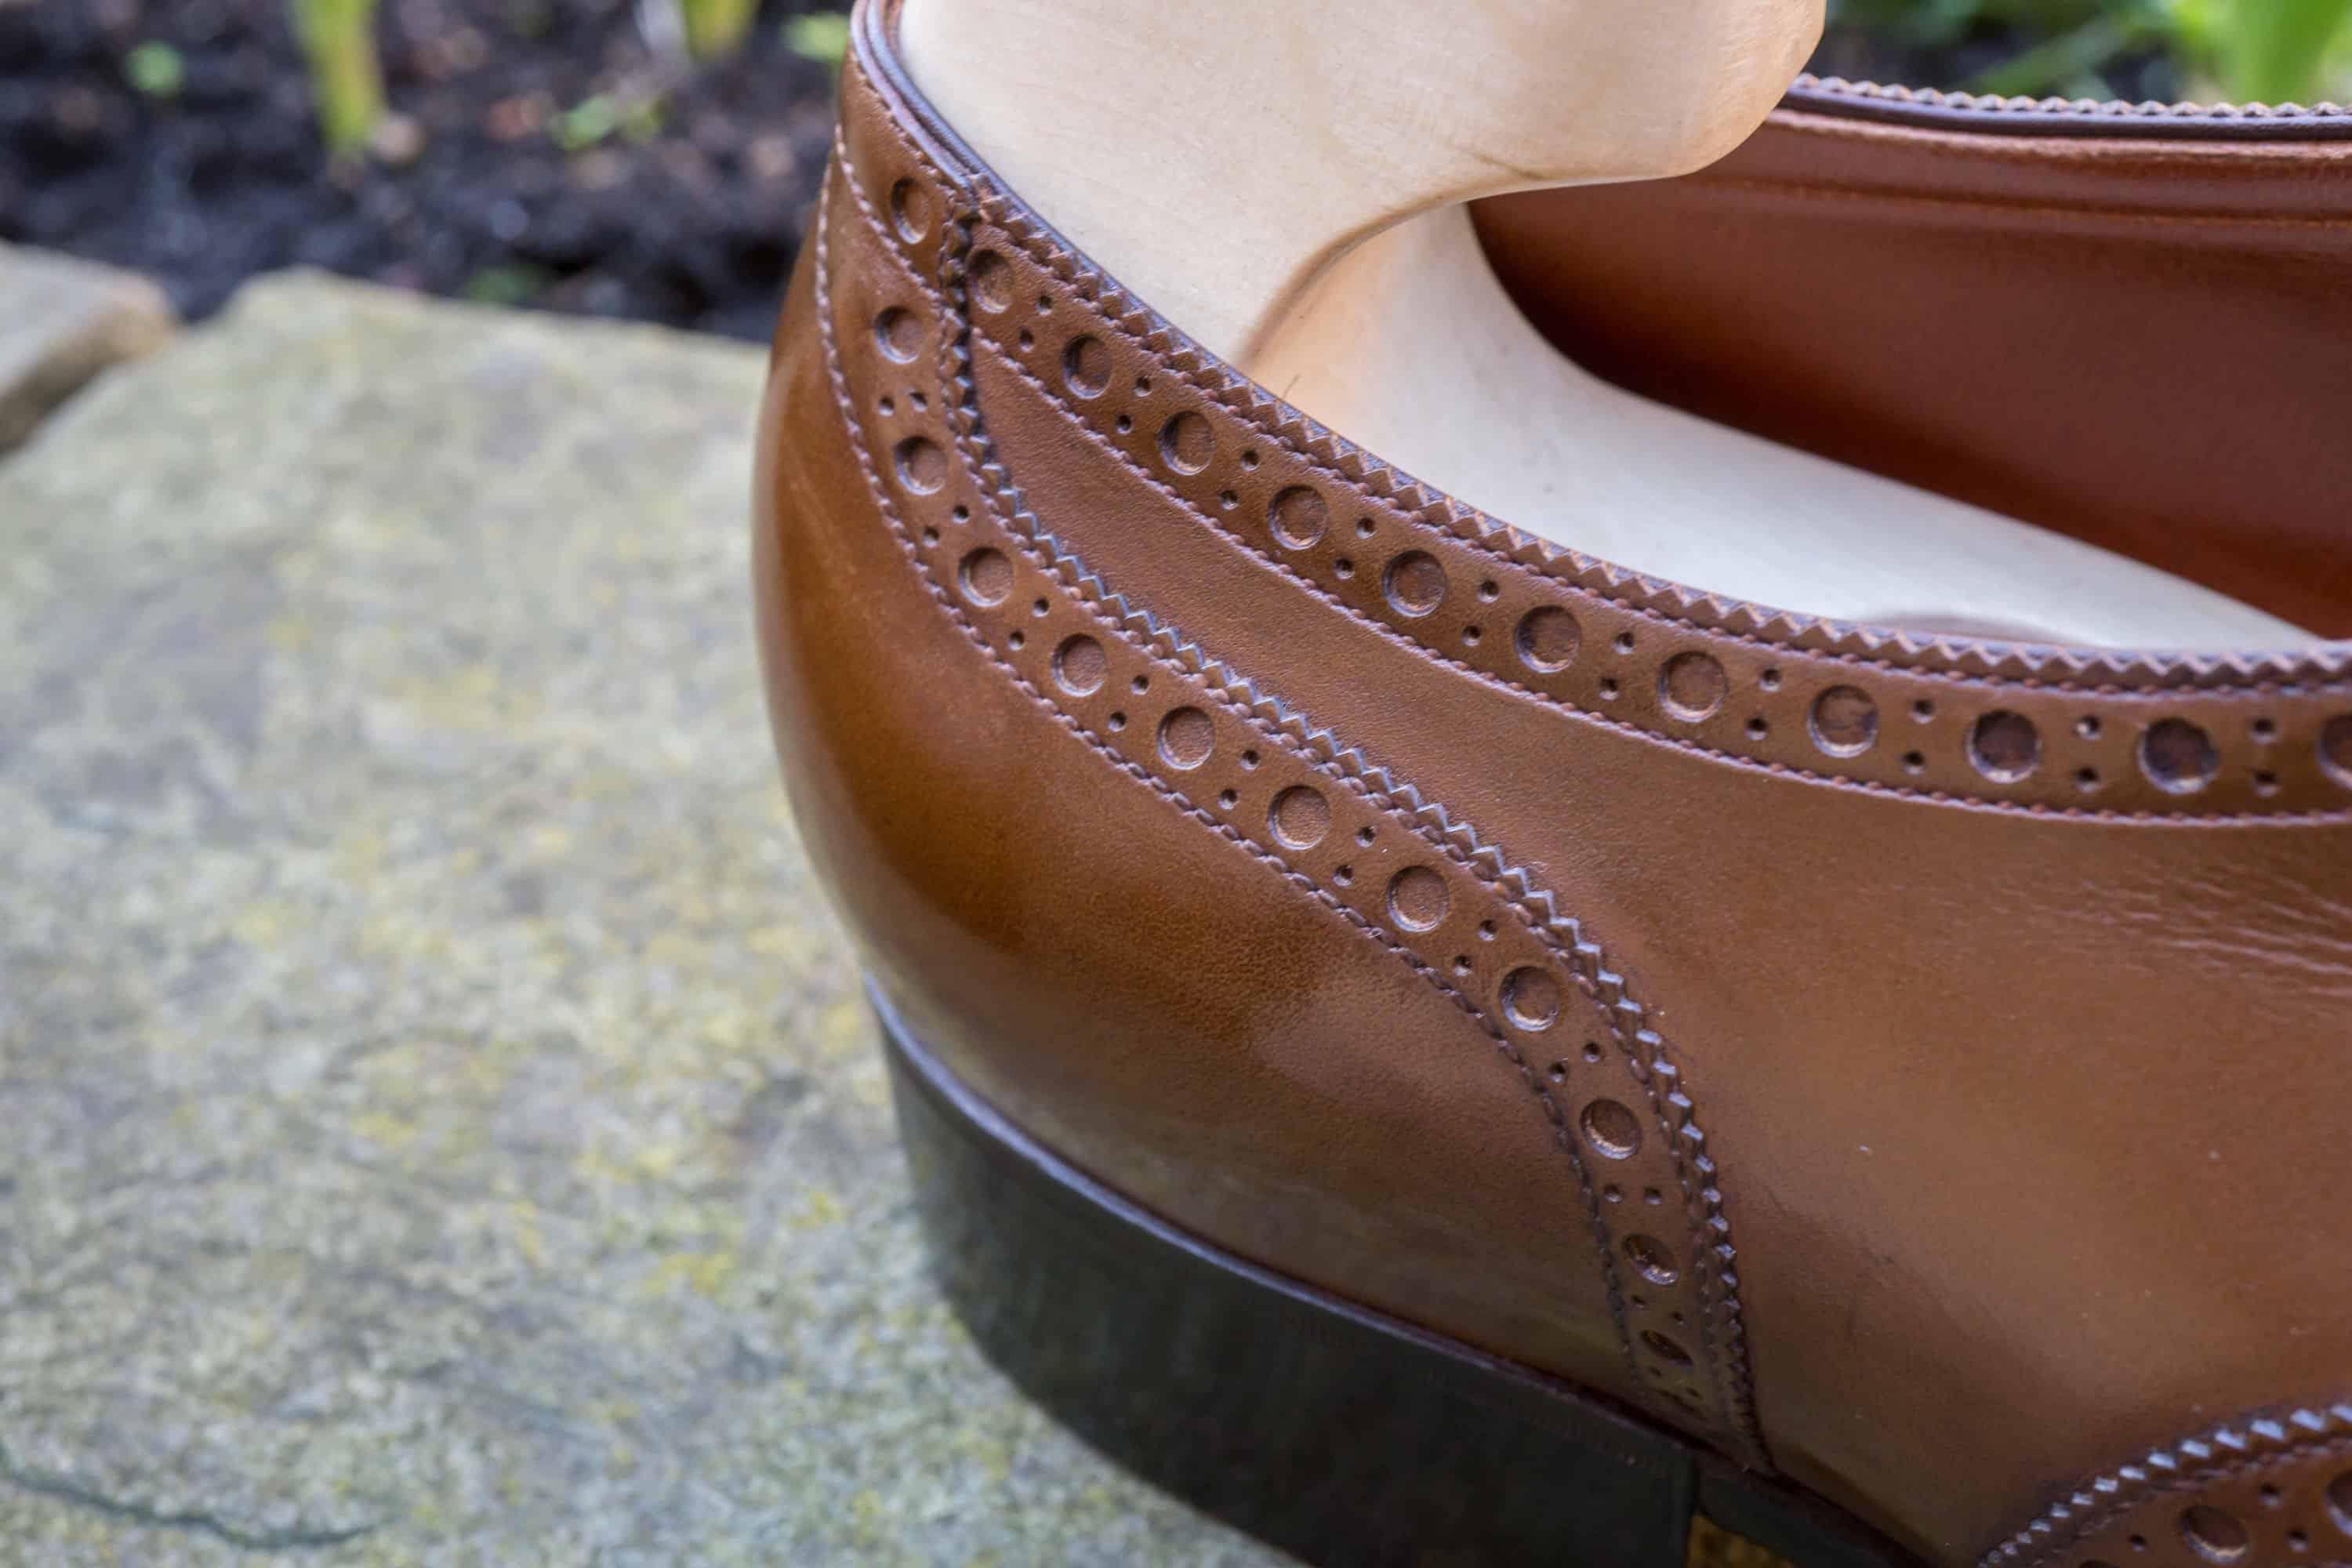
Fantastic finish.

A Main d’Or sole.
Early he was highlighted in the Japanese style magazine Men’s Ex, which gained him a stable customer base from the start. It has grown slowly over the years as the reputation about the extremely well-made shoes Eiji Murata put together in his small workshop in the outskirts of Tokyo, under the name Main d’Or (French for golden hand), was spread wider. With the internet, he has obviously become more famous, especially in recent years, but since he has no website and there are still not lots of good pictures on his shoes (if you Google you note that half of the pictures shown are shot by me) he is still relatively unknown.

18 spi (stitches per inch), 16 spi, 14 spi.

Samples lined up.

Quarter brogue.
After myself and others encouraged him (read: nagged on him) that he should start an Instagram account, Eiji Murata did just this (one account which is the most active one from is mobile phone showing mainly the production, one with pictures with camera submitted via the computer which mainly shoe finished shoes), and it is a pleasure to accompany long series of pictures that show in detail the different parts of the manufacturing process. About one day a week, he works as a teacher at a crafts school in Tokyo, where he teaches new aspiring shoemakers the basics, and you can see on his Instagram that he knows how to teach making to others and that he is very open to sharing his knowledge.

Workbench for bottom work.

Tools.

Eiji lasts an upper leather.
Eiji Murata nowadays has his workshop in Chiba, close to where he grew-up, it takes about 30-40 minutes to go here from central Tokyo, and another 15 minutes with taxi. He works alone and does everything himself; measurement, pattern making, lastmaking, closing, bottoming and finishing. He has some sample shoes on display here, around 15, where the majority are dress shoes but also some more casual models and heavier shoes as well to show how he makes those.
Offerings and prices
Main d’Or only offer full bespoke, which means the last is fully personalised, and it is up to the customer to choose the model and all the details. Of course, as always, one should look at existing shoes and get to know Eiji Murata’s style and how he builds shoes, and make sure that it is something that appeals to you. He is completely Japanese-trained, this shows in several ways in his house style, mainly in different design features such as the distinct transition between the sole edge with sole stitching and blind welted waist edge, while the overall look is a bit British inspired.

Different shades of brown plus one black.
The price for full bespoke at Eiji Murata is, looking at the quality level of the shoes in comparison to many other bespoke companies, relatively low. They start at €2,600 including lasted shoe trees (300,000 yen for the shoes, 35,000 yen for shoe trees). If you choose other leather than calf or suede or more complicated models, the price might go up. To get in touch with Eiji Murata, email to main.d.or2.13@gmail.com (it works in English).
Order and measurement process
Main d’Or’s shoes are not easily accessible. Since he never do trunk shows or similar, it’s only by visiting his showroom next to the workshop that you can make an order, and you’ll have to go there twice for fittings (he always makes two fitting shoes), and preferably a third time since Eiji Murata would like to see the finished shoes on the feet to see if any corrections still need to be made for future orders. To travel three or four times to Tokyo during a couple of years is not something that all non-Japanese have the opportunity to do, of course. For an initial order, you can expect about two years of waiting time, with fittings then about 7-8 months apart. Of course, these fittings can be made with more time in between them, but then the waiting time will be even longer.

Some lasts of customers.
Since he as mentioned works alone, production is very limited, he only makes about 15 pairs of shoes a year. That’s even though he works for about ten hours every day of the week, only a few Japanese holidays he takes time off, but then he has lessons at the school that takes some time, plus the fact that he puts about 150 hours on each first order (including the whole process, with lastmaking, fitting shoes, modification of last, same process again for even nicer second fitting shoes, and then completion of lasts and shoes) the output will be small. When you have a last finished and place additional orders, the waiting time becomes shorter, as no fittings need to be done, but you can still expect about one year.
When visiting his small showroom, he offers you a cup of green tea and have you sit down on the couch to first go through the details of the shoe you want to order. Eiji Murata speaks a little English, and he has a prepared document in English (relatively understandable) that explains the process. However, if you have the option of having someone who can interpret in Japanese to accompany you, it is easier to understand each other and avoid misunderstandings.

During the order of my pair. The model to the right was my starting point. The picture also shows the English information document he has, and some leather samples.
As always, it is easiest to if you start with one of the samples available, and in my case there was a light brown semi brogue shoe that I liked a lot. What I changed from his sample was to have no metal eyelets, no gimping (the briery edge along the leather pieces), and a less marked transition between the sole and waist edge. Eiji also usually makes a heel that he builds up a lot towards the upper, I wanted to have a it a bit less pronounced. Single leather sole and his black “piano lacquer” sulfinish. The leather I chose was a vintage light/mid brown aniline dyed calf from the Italian tannery Zonta, very nice. The last has a classic round toe. Eiji Murata writes down all the details that are agreed upon, and also things such as sole thickness, heel height, medallion and brogueing (size of it) and so on are also noted.

A clearer picture of the model I based my order on.

Leather swatches.

The skin from Zonta I chose to make the shoes in.
After the details of the shoe you want to order are set, it is time for measurement. First, Eiji asks some questions about how you want shoes to fit, what fit problems you usually experience, and so on. The measurement process is then extremely thorough. A lot of measurements are taken, both standing and sitting, with and without socks. He draws outlines of your feet in different ways, and photos are taken of the feet from various angles. For my feet, he was struggling with how he would work around my hallux valgus issues, especially on the right foot.

A tool to help get the outline around the foot fully accurate.

Foot problems are discussed.
First fitting
The first test shoe is ready approximately 7-8 months after ordering and measurements. It is a bit more simple fitting shoe in the same pattern as ordered but without any brogueing, still hand welted but with a simple cemented sole. You try it on during the visit, and Eiji carefully checks the fit, pinches and squeeze, notes and asks. The fit on my test shoes were quite okay, but there were parts to fix. It was a bit tight at my inner ball, some space on top of the vamp, and the toe shape was a bit too symmetrical.

My first pair of fitting shoes. Made in the same leather as I ordered, though untreated, and from parts of the skin that he would not use for final shoes.

The shoes on the feet.

Eiji Murata is thinking.

The underside of my last, with markings according to the system that Eiji uses in last production, called Kagami.
Second fitting
A further 7-8 months later comes a package on the post with a new pair of fitting shoes. These are more well-made, hand welted with the right pattern and in the correct leather (albeit worse pieces), properly built heels, really good finish, and so on. These are used for a month to have a really good idea of how the customer perceives the fit, before a new visit is made to Eiji.

The second fitting shoes are made more or less identical to the final shoes, except for the sole and sole edge. The finish is really nice, and it’s a bit sad that they will be discarded after just a month.

Even if you can be impressed by these test shoes, I personally think that fitting shoes that have a sole edge that correspond to the finished shoes make it easier to picture the final shoe in front of you.

On the feet.
Many of the problems that were with my first fitting pair were fixed, but on the other hand, the toe box was slightly short and low now so my big toes didn’t have enough space. That made me not able to use the shoes too much, but still got a good idea of what needed to be done. At the fitting of Eiji Murata, you bring the shoes with you, and in my case he now cut them open to get a better picture of what had to be done on the toes. We talked about increasing height a bit and we agreed that the toe would be done a bit longer as well, and the pattern was corrected a bit to accompany this. A part from this, they were a bit narrow still at the feets widest part, and some other minor things were to be fixed.

Back at Eiji Murata’s showroom again, where he has marked corrections on the shoes.

Eiji marks corrections on the lasts.

To get a better picture of the toe problems, he cut the shoes open, something he usually does not do.

Photo time. Here you can almost see that there is little space for the toes.
Manufacturing
Eiji Murata’s shoes are extremely distinctly made. You can see that he also works as a teacher who will get others to understand how it works, since everything is made very clear, clean, straight, and again, distinct. Below a substantial series of pictures that goes through many parts of the production of my pair.

The final lasts, where you can see how the toe is extended and also made a bit wider on the sides of the ball.

The pattern begins to be drawn to the last.

Over to two-dimensions. Eiji also mark out side reinforcements and other things, so it’s quite busy.

The finished pattern parts before they are placed properly on the leather.

The parts cut out, and with the brogueing done. All the holes are made by hand.

The uppers have been closed. Also this part Eiji makes himself, and it’s impressively done.

The soaked insole attaches to the last.

They are then blocked to get the shape properly, Eiji Murata uses bicycle tubes to keep the insole tight agains the last.

Heel and toe stiffeners are cut out and skived (when they are thinned out towards the edges).

Stiffeners blocked.

Here the holdfast have been cut out and with an awl the holes are prepared for the welt stitching. Note that he used a hardener (which, however, is quite mild, since the leather is to be bent when in use) on the outside, making it extra distinct.

Upper is lasted.

A bit further on in that process.

Stiffeners lasted.

Glass to smoothen them.

Ready for hand welting.

Hand welting started.

Hand welting done.

Here he has attached the shank (the reinforcement at the waist) and started building up for the bevelled waist.

Bottom filling, corkplates and more leather.

Attached.

Time to fix the outsole.

The outsole is prepped on the inside.

Outsole cemented on to the shoe.

The channel where the sole stitch will be located is cut open.

Carved out to accommodate a seam.

With a heated fudge wheel he then mark where the stitches should be made on top of the welt. As apparent, the wheel used is for 14 spi (stitches per inch).

Sole stitch in the making.

Very nice and neat.

Not only on the top, but also below. Almost a bit sad it should be covered…

… when the channel is closed again.

Edges are smoothened with a piece of glass.

Then treated with a hot edge iron, here the blind welted waist is set.

Another edge iron.

It’s final shape is getting closer.

Now the stitches are to be marked further. First, he go over them with the same fudge wheel that was used before the stitches were made, which must be done in exactly the same markings.

Then a stitch prick is used to push together and mark the stitches even more clearly.

Here’s how it looks afterwards.

Now time to build a heel.

Rubber pieces he made himself.

Leather top-piece for the heel.

The heel begins to be built, here the edge is trimmed roughly.

The heels were completed and grounded roughly.

Sandpaper to grind them more properly. Finer and finer paper is used.

Here is a first layer of edge ink painted on.

Tools for edge finishing.

Wax burnet on the sole and heel edges.

The outer layer of the outsole is removed with a piece of glass.

Black color.

Several layers.

Eiji Murata is famous for his very shiny soles, which he accomplishes by saturating them heavily with wax.

A bit further into the process.

Sole edge shined.

The sole also gets regular wax polish.

Now time to attach the metal toe tap.

Cut out so that the sole stitch is intact below.

The toe plate is screwed into place. All pictures of the making: Eiji Murata
Final result
The shoes are delivered in a regular shoe box with two rather thick bags. The lasted shoe trees are hollow, with a rear part slightly smaller in size. They are very well done. The shoes have a spit shine on the toe and good shine on top of the heel cap, but there is no high shine all over the shoes as it is on his sample shoes, as it would just crack immediately when they were worn.
What, on the other hand, is in line with his sample shoes is the amazing finish and building quality. The pictures below speak for themselves, it’s really an impressive craftsmanship. It’s clean and tidy, the closing is impeccable, the tight sole stitching and the finish of the welt are impressive, the heavily bevelled and tight waist is wonderful, and so on. Then, of course, Eiji Murata is also human, there are things that are not quite 100 percent. For example, one can see that he had a bit of an effort to keep his heels identical, or that he did not really get it evenly on the outside of the right-hand side, where the waist edge meets the heel and the upper brogueing goes down. But these are really small things in the context. It is absolutely world class on the construction of these shoes.
Also the material is as expected, excellent, the Zonta leather is soft and supple with a nice surface.
As for the fit, Eiji Murata has been doing really well, the best first pair I’ve had so far among all the bespoke or semi bespoke I’ve ordered. Since the sole is thicker than traditional British school for single leather soles, and maybe also a bit because of the use of hardeners on, for example, the insole, it takes a number of uses before they begin to soften properly. They also pinched a little on the top of the big toes in the beginning, before the leather softened, a not unusual thing on new shoes, but usually disappears when the leather softens, which also were the case here. Now after maybe 20 uses, they are completely broken in, and in fact, it’s actually only a slightly bigger correction that I see needs to be made is the shape of the heels, since I get a bit of heel slippage if I don’t lace them properly. There’s also some space behind the inner ball down towards the sole edge. Apart from that, only minor corrections that need to be made to the next pair.
Talking shape, I would also like to lower the toes a millimeter or so. He aded on here after the last fitting when the toes touched, but think one could remove a little bit and get a bit smoother shape on the toes.
I had high expectations on Main d’Or, and I am very pleased that those expectations were fulfilled. a second pair is already ordered.
We finish with a number of pictures of the masterpieces:

The very neatly made shoes.

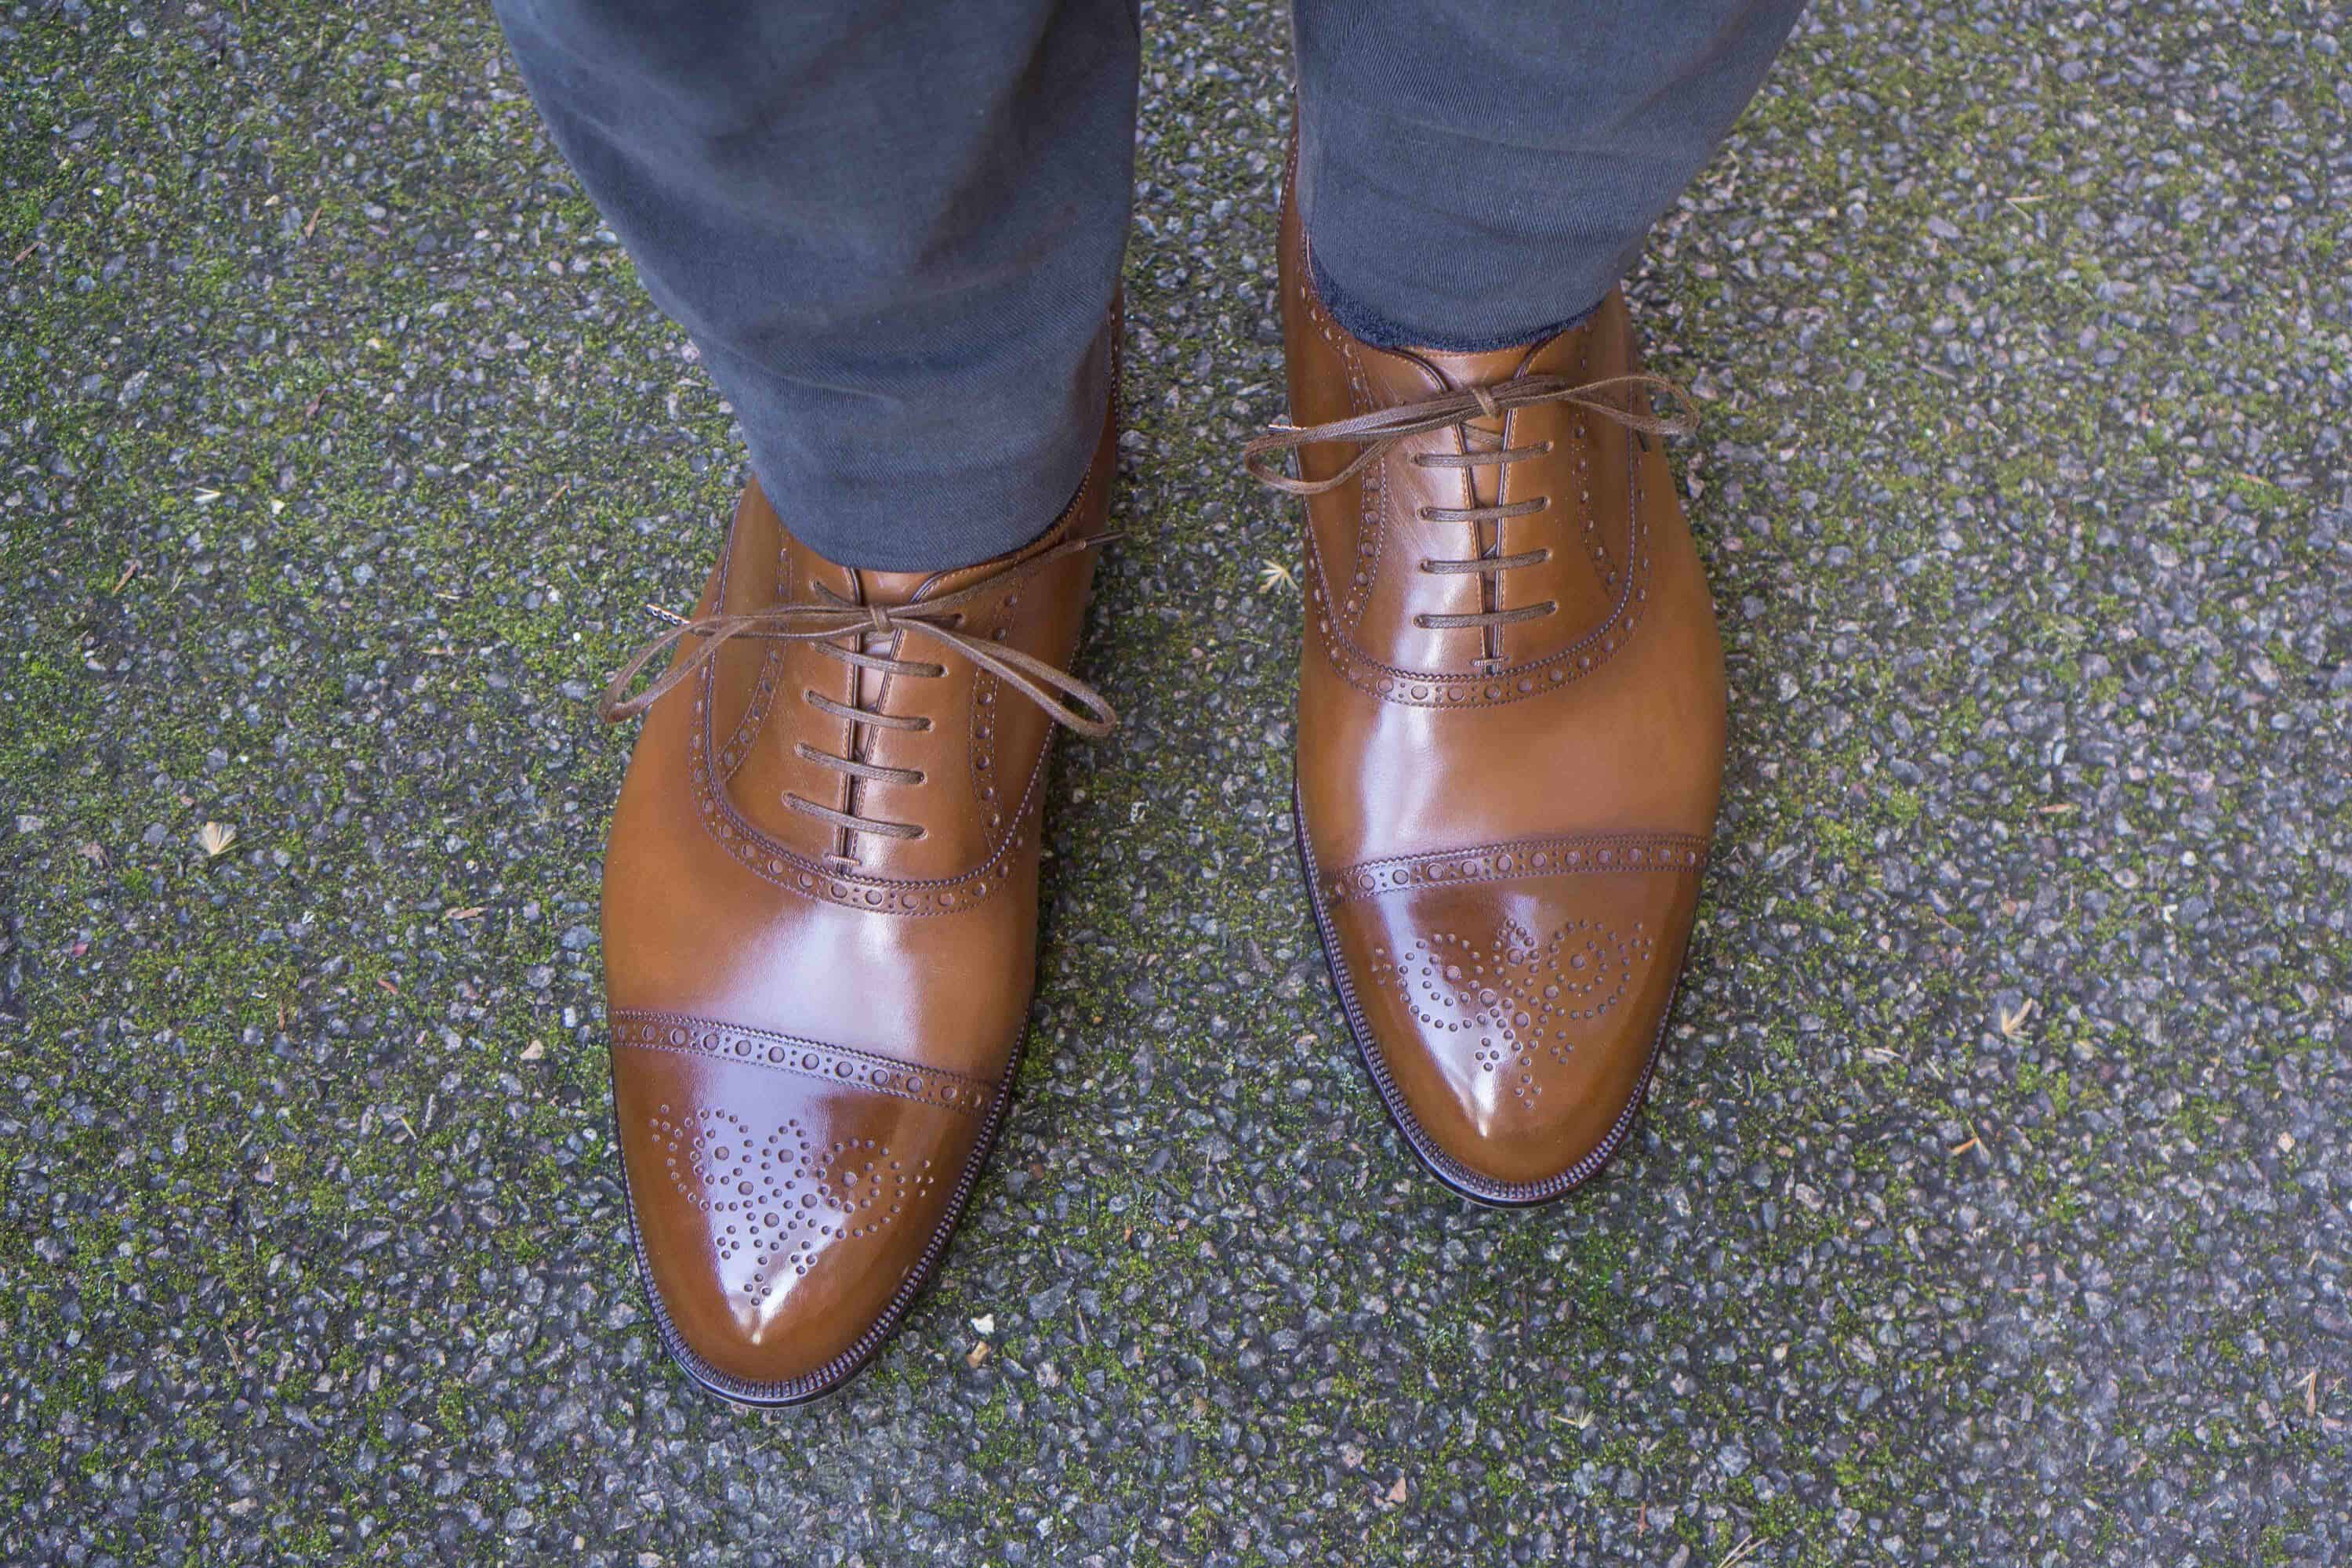
From the front.

Here you can see that the toes are quite high, could be a millimeter lower from where the cap begins and forth, to be perfect in my eyes.

Shoe seen in profile from outside.

From the inside. Note how the pattern on the heel cap brogueing goes down just in the middle of the back of both sides of the heel. It’s no coincidence that it looks like this.

The beautifully made sole stitch and the finish of the welt and sole edge.

An even closer look.

Seen in profile.

Very beautiful how the waist just disappears in at the arch.

The amazing soles.

Strongly built-up waists.

The piano lacquer finish shines nicely.

Precision-built heels.

Seen from behind.

Sharp.

Blind welted waist, where the sole is laid over the welt so that the seam is completely covered.

Close-up of the closing.
Basically perfect.

Main d’Or’s beautiful solution for the back seam.

Braided reinforcement stitch.

More of the sole.

The front edge of the heel is beautifully sharp.

Shiny heel.

End with some pictures of the shoes on the feet.
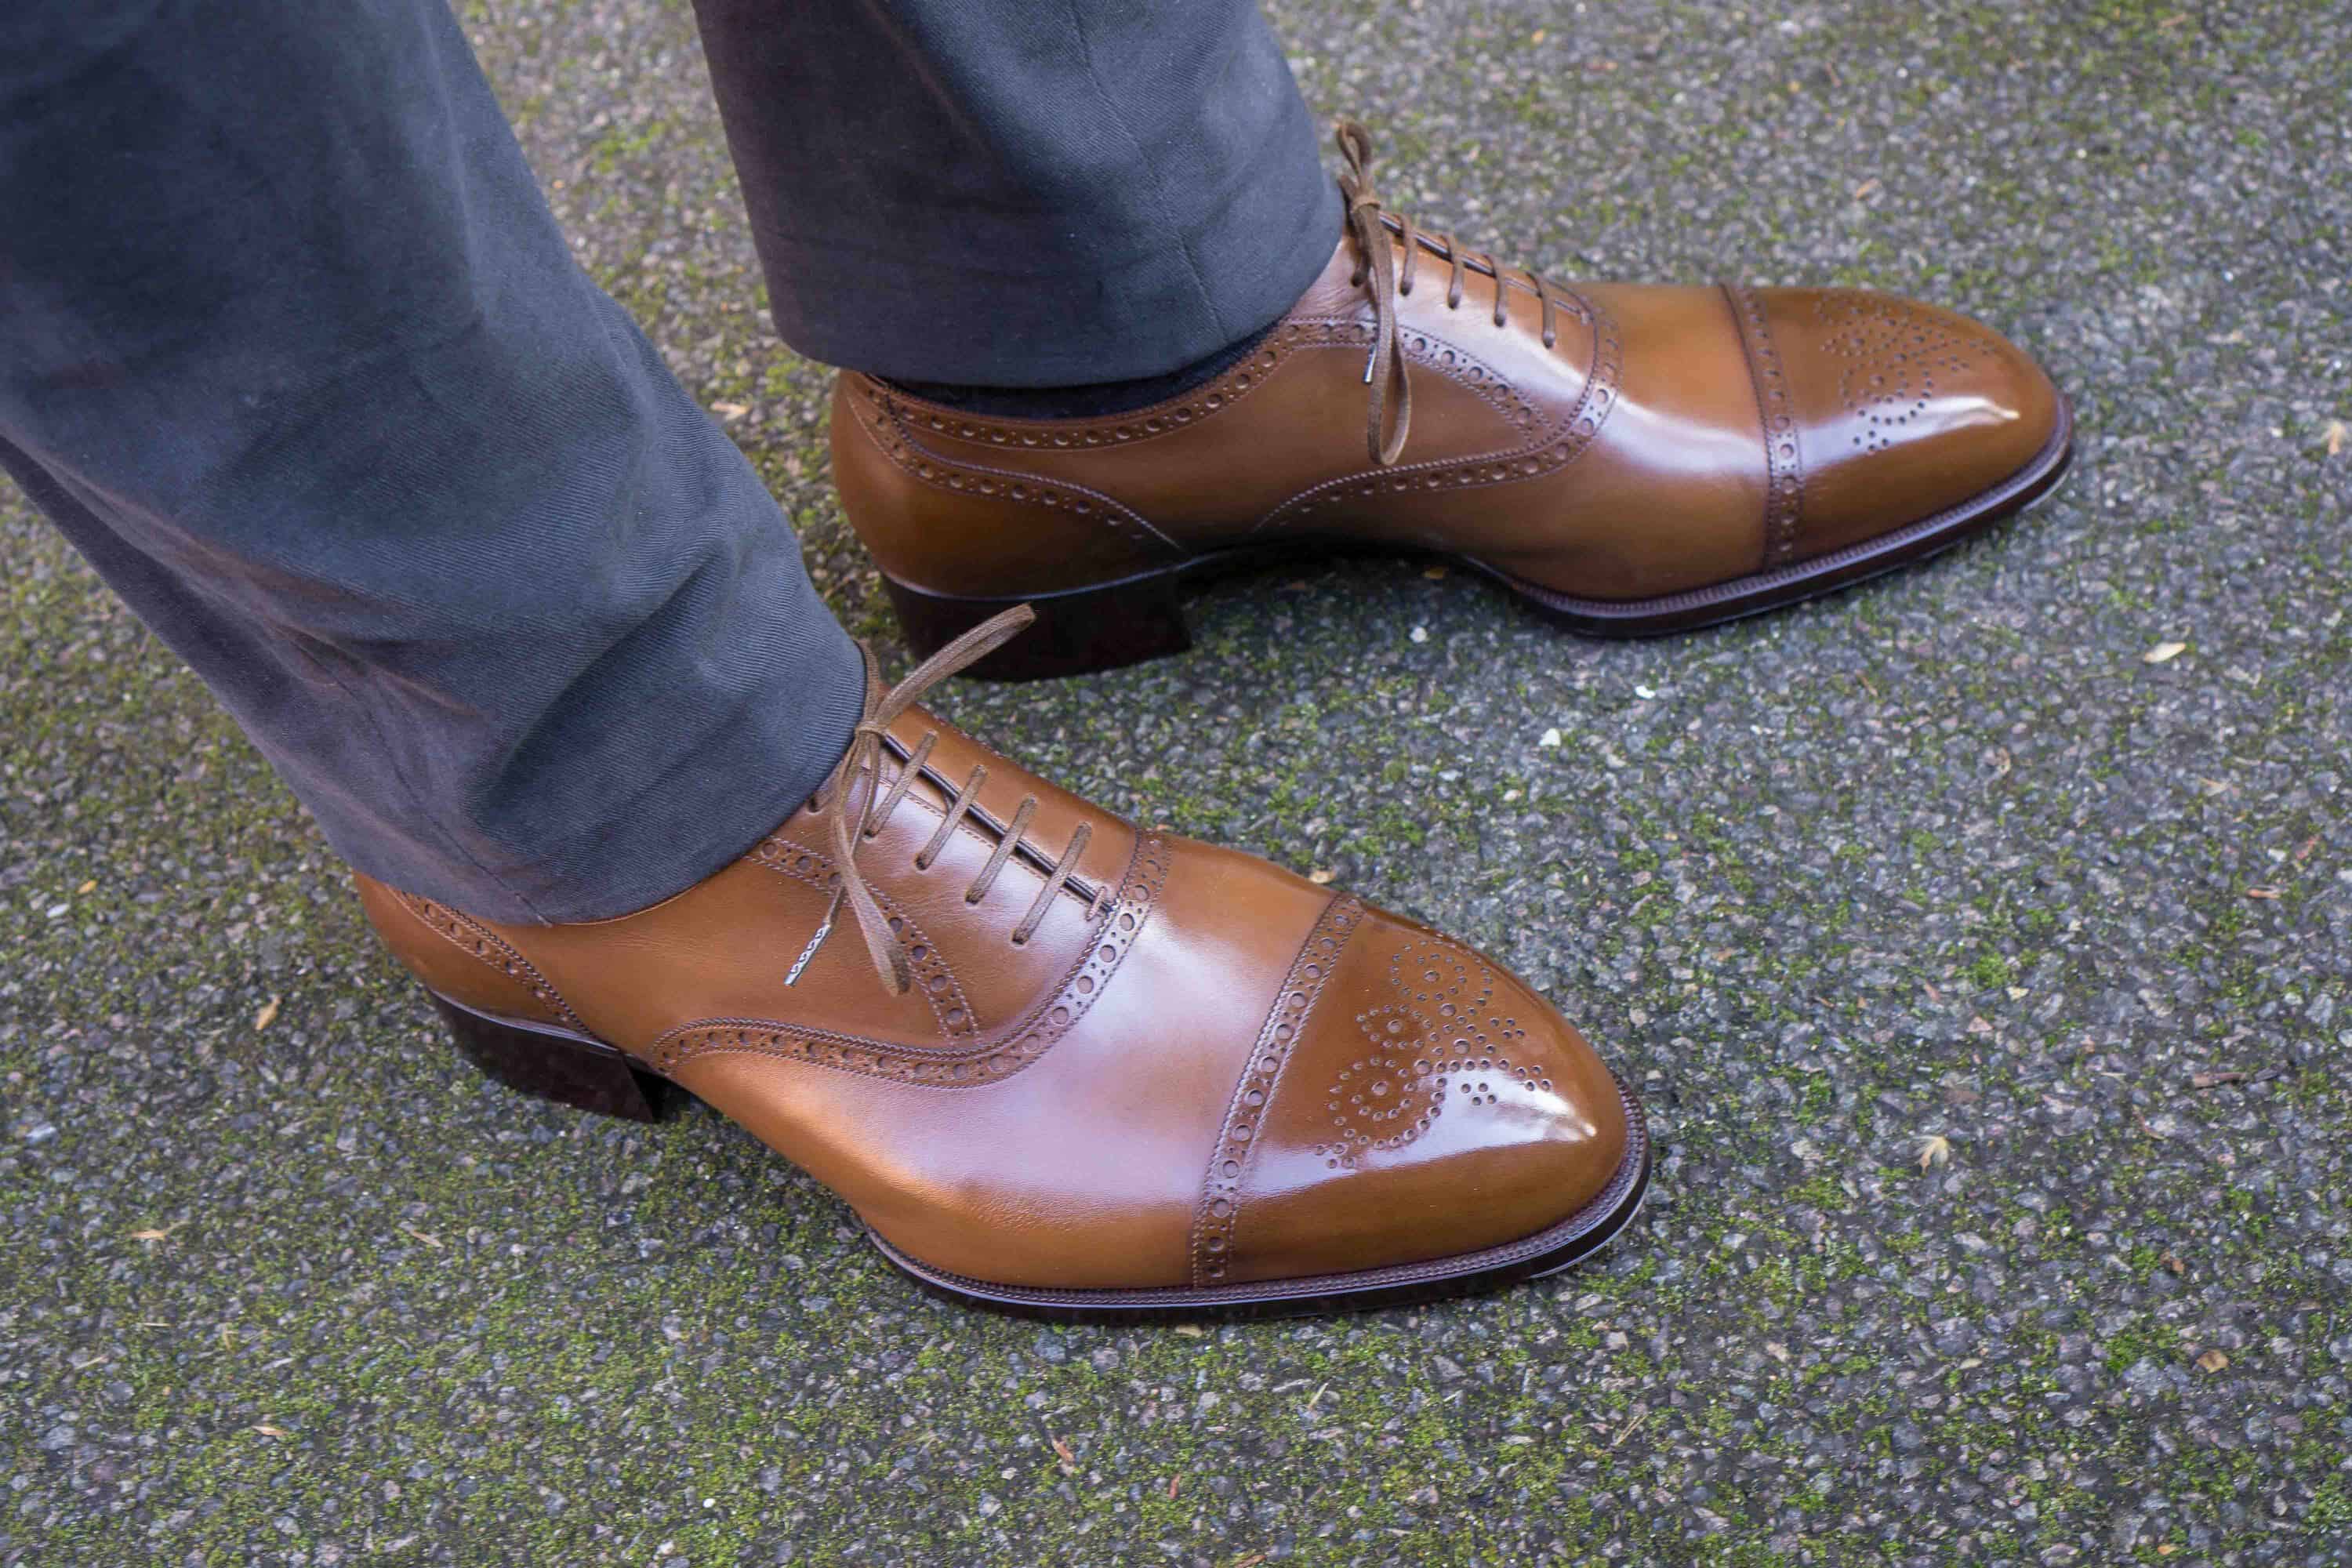
–
–


Wonderful article, bravo! Never thought I`d see you in flat laces though!
Daizawaguy: Thank you! Hehe well they were delivered with those. Didn’t have round laces in the right color at home and a bit hard to find, but switched now anyway, since can’t stand those bloody flat ones 🙂
Thanks for the review of this amazing pair of shoes and cobbler! It’s a nice discovery, at least for me. Would you mind updating us on how they look in half a year? I’ve always been a curious about closed seam shoes.
Appreciate this comprehensive review, Jesper. I almost commissioned a pair last year, which may still happen at some point. Perhaps initially I was slightly intimidated by Murata san’s advice that “from overseas, I think there are many difficult things” (but clearly not insurmountable, as your beautiful shoes show). At least at that time (October 2017), he informed that payment was cash or bank transfer only, not by credit card – not sure if that’s still the case.
Nothing else about this article besides amazing!
Steve Kim: Thanks a lot! Follow my Instagram, will be posted pictures there regularly.
Chris: Thank you! Ok cool, hope it will happen. It is definitely more difficult to order for customers from abroad, with the need to travel there, the fact that our feet are slightly different from Asian feet, and also payment as you mention (forgot that in the article). He don’t accept credit card, I’ve done bank transfer for all my payments.
King Enzo: Thanks, glad you like it!
I literally just found this website a few hours ago, and I’ve already fallen in love with it. So much useful information and beautiful pictures. And also presented very well and simple. I don’t know why I didn’t find this site sooner, but I can tell that it will form a great addition to some of the Youtube channels like Kirby Allison which I’m already following very avidly.
Since I live in Japan myself, I would certainly want to consider this cobbler as a potential if I get myself some bespoke shoes in the future (sadly, that is likely still light years away…).
One question I have for you: how comfortable do you feel wearing these shoes, knowing they cost you a fortune to make?
I’m already treating my RTW shoes from chain stores like my beloved puppies whenever I wear them, but I couldn’t imagine how I’d feel if I had shoes like yours that were accidentally stepped on, or got even one single scuff mark on them.
Victor: Thanks a lot, glad you enjoy the blog! I care a lot about my shoes, but I also see them all as just that: shoes. They are supposed to be worn, and there will be scratches etc. Most you always are able to polish away anyway, and the look of well-worn great quality shoes is just lovely IMO.
Does anyone with recent experience know if Main d’Or’s gmail account still the best way to make an appointment with Mr. Murata? I have not received a response after several days. I have a Japanese number and could have a native speaker call if there is a good contact number.
Alex: He still uses that yes, but he can be slow replying. If still no reply try again in a few days. You could also comment on an instagram post and say you’ve e-mailed, and explain you are a serious potential customer (he gets so many contacts that don’t really understand things).