

Time for the penultimate installment in the series that follows the process and the production of a pair of bespoke shoes from Gaziano & Girling. This part follows the production of the final pair, I myself spent a week in Northampton to document it all.
It was almost a year ago that I made the order of a pair of bespoke austerity brogues from Gaziano & Girling in their store on Savile Row (read about it in part 1 here), then I had a first fitting in Stockholm at Skoaktiebolaget (read part 2 here), and at the second fitting only minor changes was left to do on the lasts (read part 3 here). After that I actually had a first real shoe made but with machine stitched rubber sole, since I was in great need of such a shoe we chose to male it before the completion of the original order. So that way, you could say that I had three fittings, and even after this were a couple of small things to change, especially that they were somewhat tight for the pinky toes, and also there was some air just behind the ball of the foot at on the underside, plus that I wanted the toe a bit less assymetric.

The pair with rubber soles that became the first real shoe was a so-called swan neck oxford. Here the upper has been lasted.

The sole of these attached, which was done with a machine since it works much better for rubber soles.

The finished pair.
But since it’s the austerity brogues we follow in this article series, it’s what we continue to do, and as mentioned I spent last week in Kettering, Northampton, to follow the Swede Daniel Wegan’s work with the production of the final shoes. Daniel is the head of their bespoke department, he is the lastmaker, but also does a majority of the brand’s making on his “spare time”. It was obviously partly to be able to make a nice post here on the blog, but mainly it was out of interest to see and learn more for myself. I have spent a week with the Swedish bespoke shoemaker Janne Melkersson for his course in shoemaking, which was extremely rewarding and whetted the appetite. As mentioned before, it’s not at all about that I should learn to make shoes, I’m just interested to learn as much as possible about how it’s done. Since I documented the process of the production very thoroughly when I visited Janne in two very long blog posts (only available on the Swedish version unfortunately, part 1 here and part 2 here, will likely be translated in the future), it will be a bit less detailed this time with focus on pictures.
As I wrote after the visit to Janne what once again hits me is the enormous number of steps required to make a handmade pair of shoes, not least the constant preparation of different parts, which take much time and fascinates. For example sewing the welt by hand is done in a bit over an hour for both shoes. Simply to prepare the side reinforcements of leather that runs along the inside of the shoe takes almost as long, and according to Daniel it’s in many ways much more essential that this part is really well made than the welt seam. To give an example.
I made record of the actual time when Daniel (or anyone else, the clicker and closer in this case) actually worked with the shoes. A total of approximately 40 hours concrete working hours were spent. This is the time forsolely the completion of the final shoe, work on measuring my feet and taking the order, lastmaking, production of the first fitting shoes, fitting, correction of the lasts and repetition of this procedure for a second fitting takes even longer. Daniel estimates that for my shoes this has taken about 60 hours, thus making the total production time when someone actually worked with the shoes in any form (not counting all the time they rest for various drying step etc) is a total of 100 hours.
As comparison Gaziano & Girling has calculated that time that someone is working on a pair of their RTW shoes in the factory, when they are actually holding them, and do anything by hand or in any of all the machines, for a pair is about 35-40 minutes. It’s of course not entirely fair to make such a comparison (for example, lasts for RTW are already produced, the machines used are incredibly expensive, all staff, rental of premises, logistics, plus lots of other expenses included in the cost of a pair of factory-made shoes must also be taken into account), but in any case it’s safe to say that it’s not unreasonable that this type of bespoke shoes have a high price.
This is also why I left out a lot of details of the process in this walkthrough. To show exactly how much work is actually done is difficult, and would likely also become quite boring, since it’s, for example, repetitive rounds where material is cut or grounded away, it would be too tedious to show everything. Nevertheless, it’s over 130 images to thresh out below (click on the images for larger versions), enjoy!

The final lasts, which had been modified slightly after the swan neck oxford shoes.
Since the pattern was modified after the last fitting it needs to be tested properly. Here’s a first version made only with two pieces of leather sewn together and the pattern marked out.

Time then start cutting out the pattern pieces to be used. Daniel Wegan use thin cardboard for this.
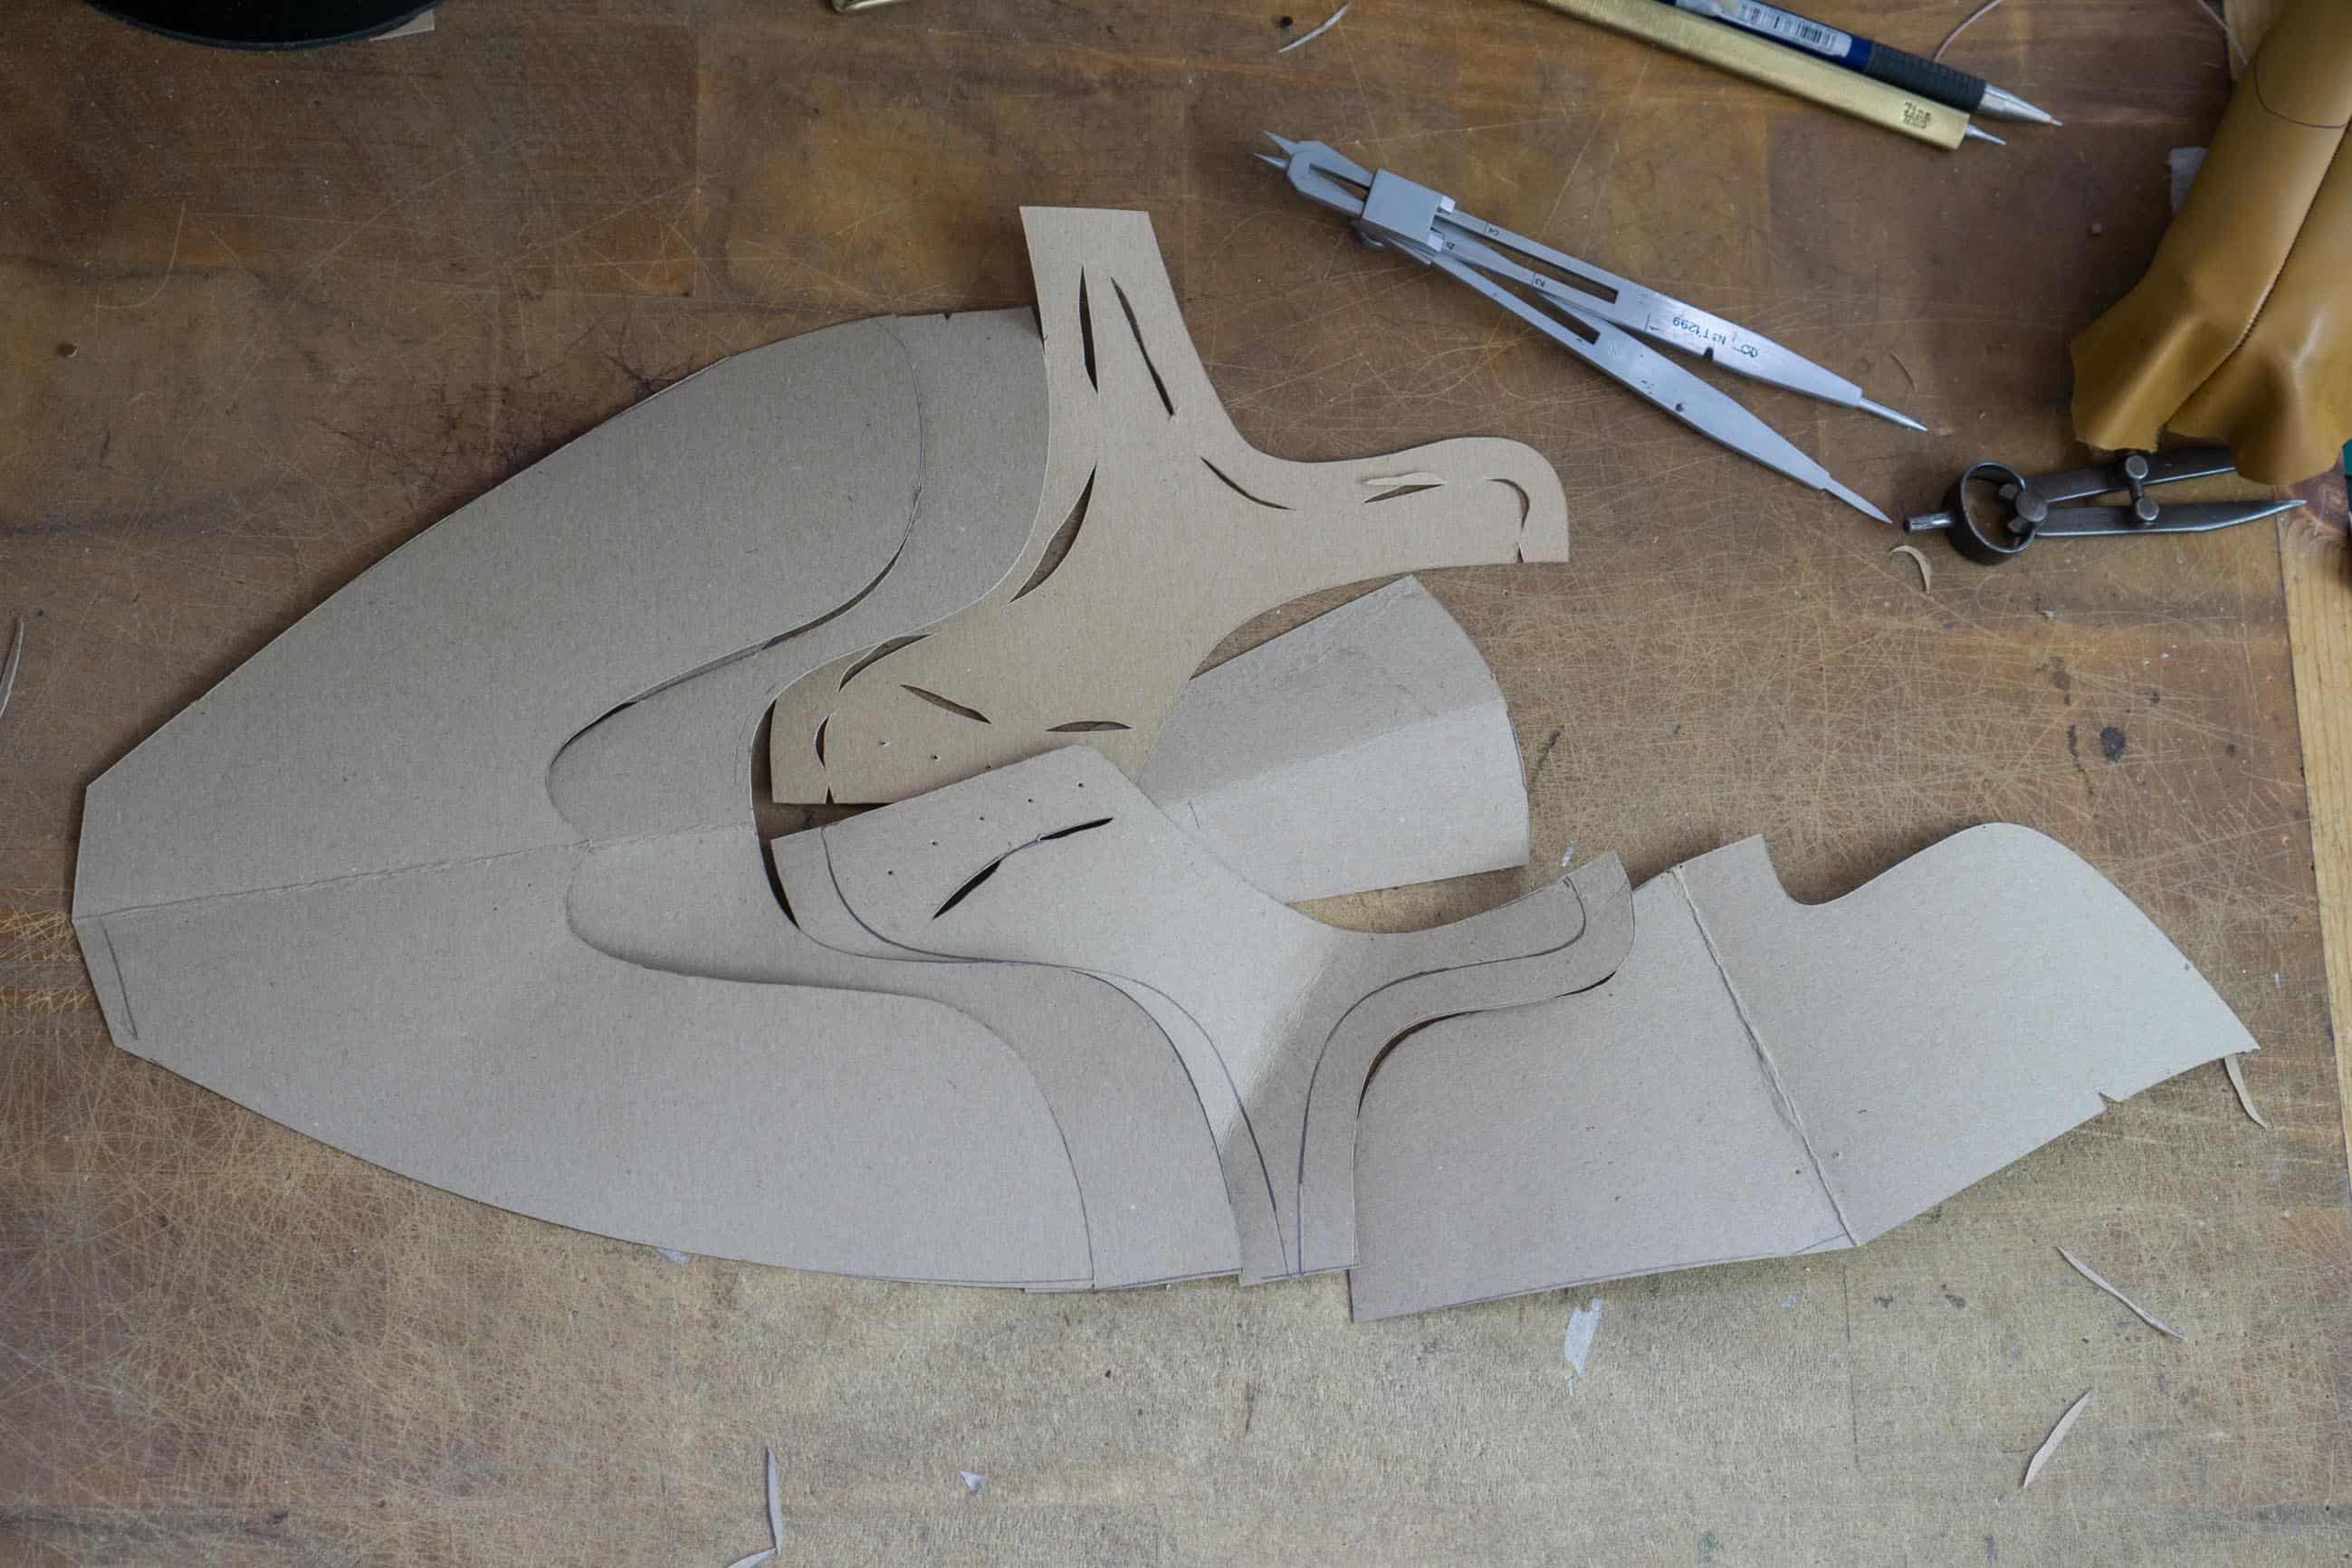
All parts of the pattern.
A proper test of the pattern is then made, where the uppers are made of scrap leather. You want to be 100% sure that the pattern is perfect before you start with the final pair, so there’s little risk that you have to dispose the real upper.
All parts again, this time in scrap leather.

The pieces are skived down at the edges and glued together before they are sewn together on the sewing machine. An opportunity for Daniel Wegan to practice a bit on upper stitching (a part of shoemaking which he has not yet mastered particularly good).

The pattern is tested on the last. It turned out that it needed to be corrected a bit, since the lacing appeared to end up being a tad off-center on the last. Therefore a new test of the pattern was made in exactly the same way as now described, but we skip that in this walkthrough.

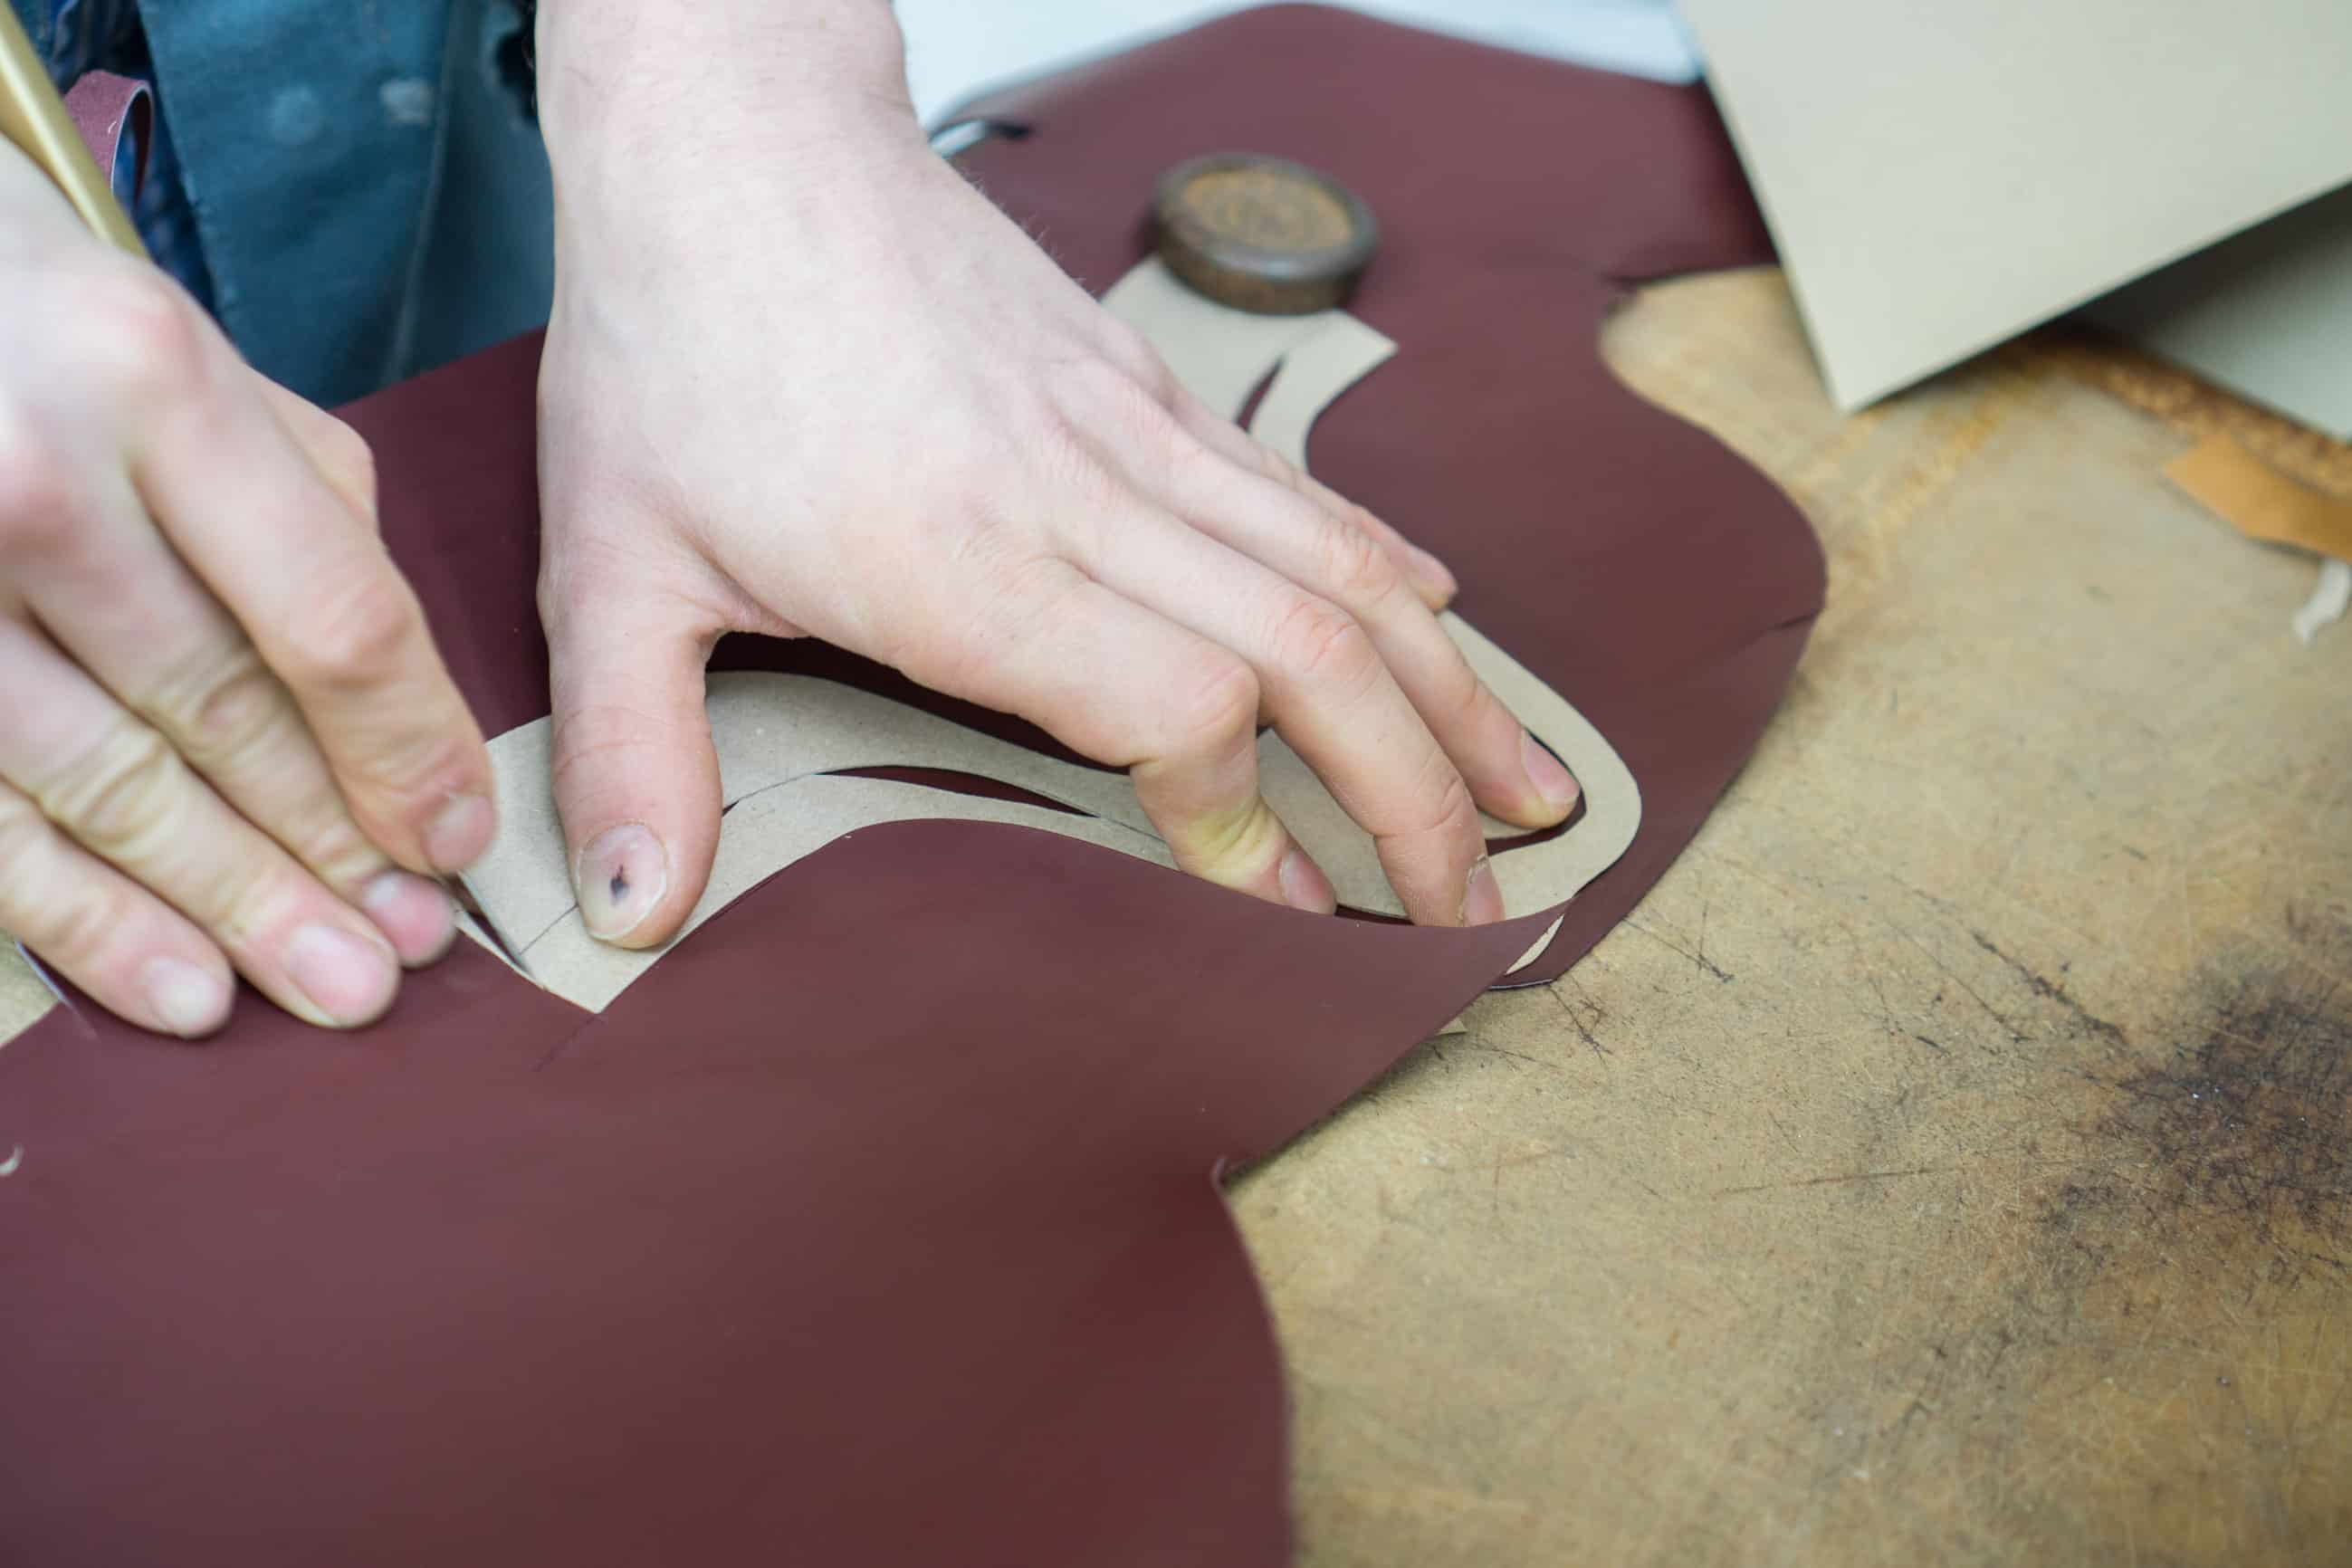
When the pattern design is completely finished the production of the final pair is started. Now we are in the cutting room where the clicker inspects hides to find a really good one.

Then the skin is carefully examined and all marks and scratches is marked out, so that these can be avoided when the parts are cut.

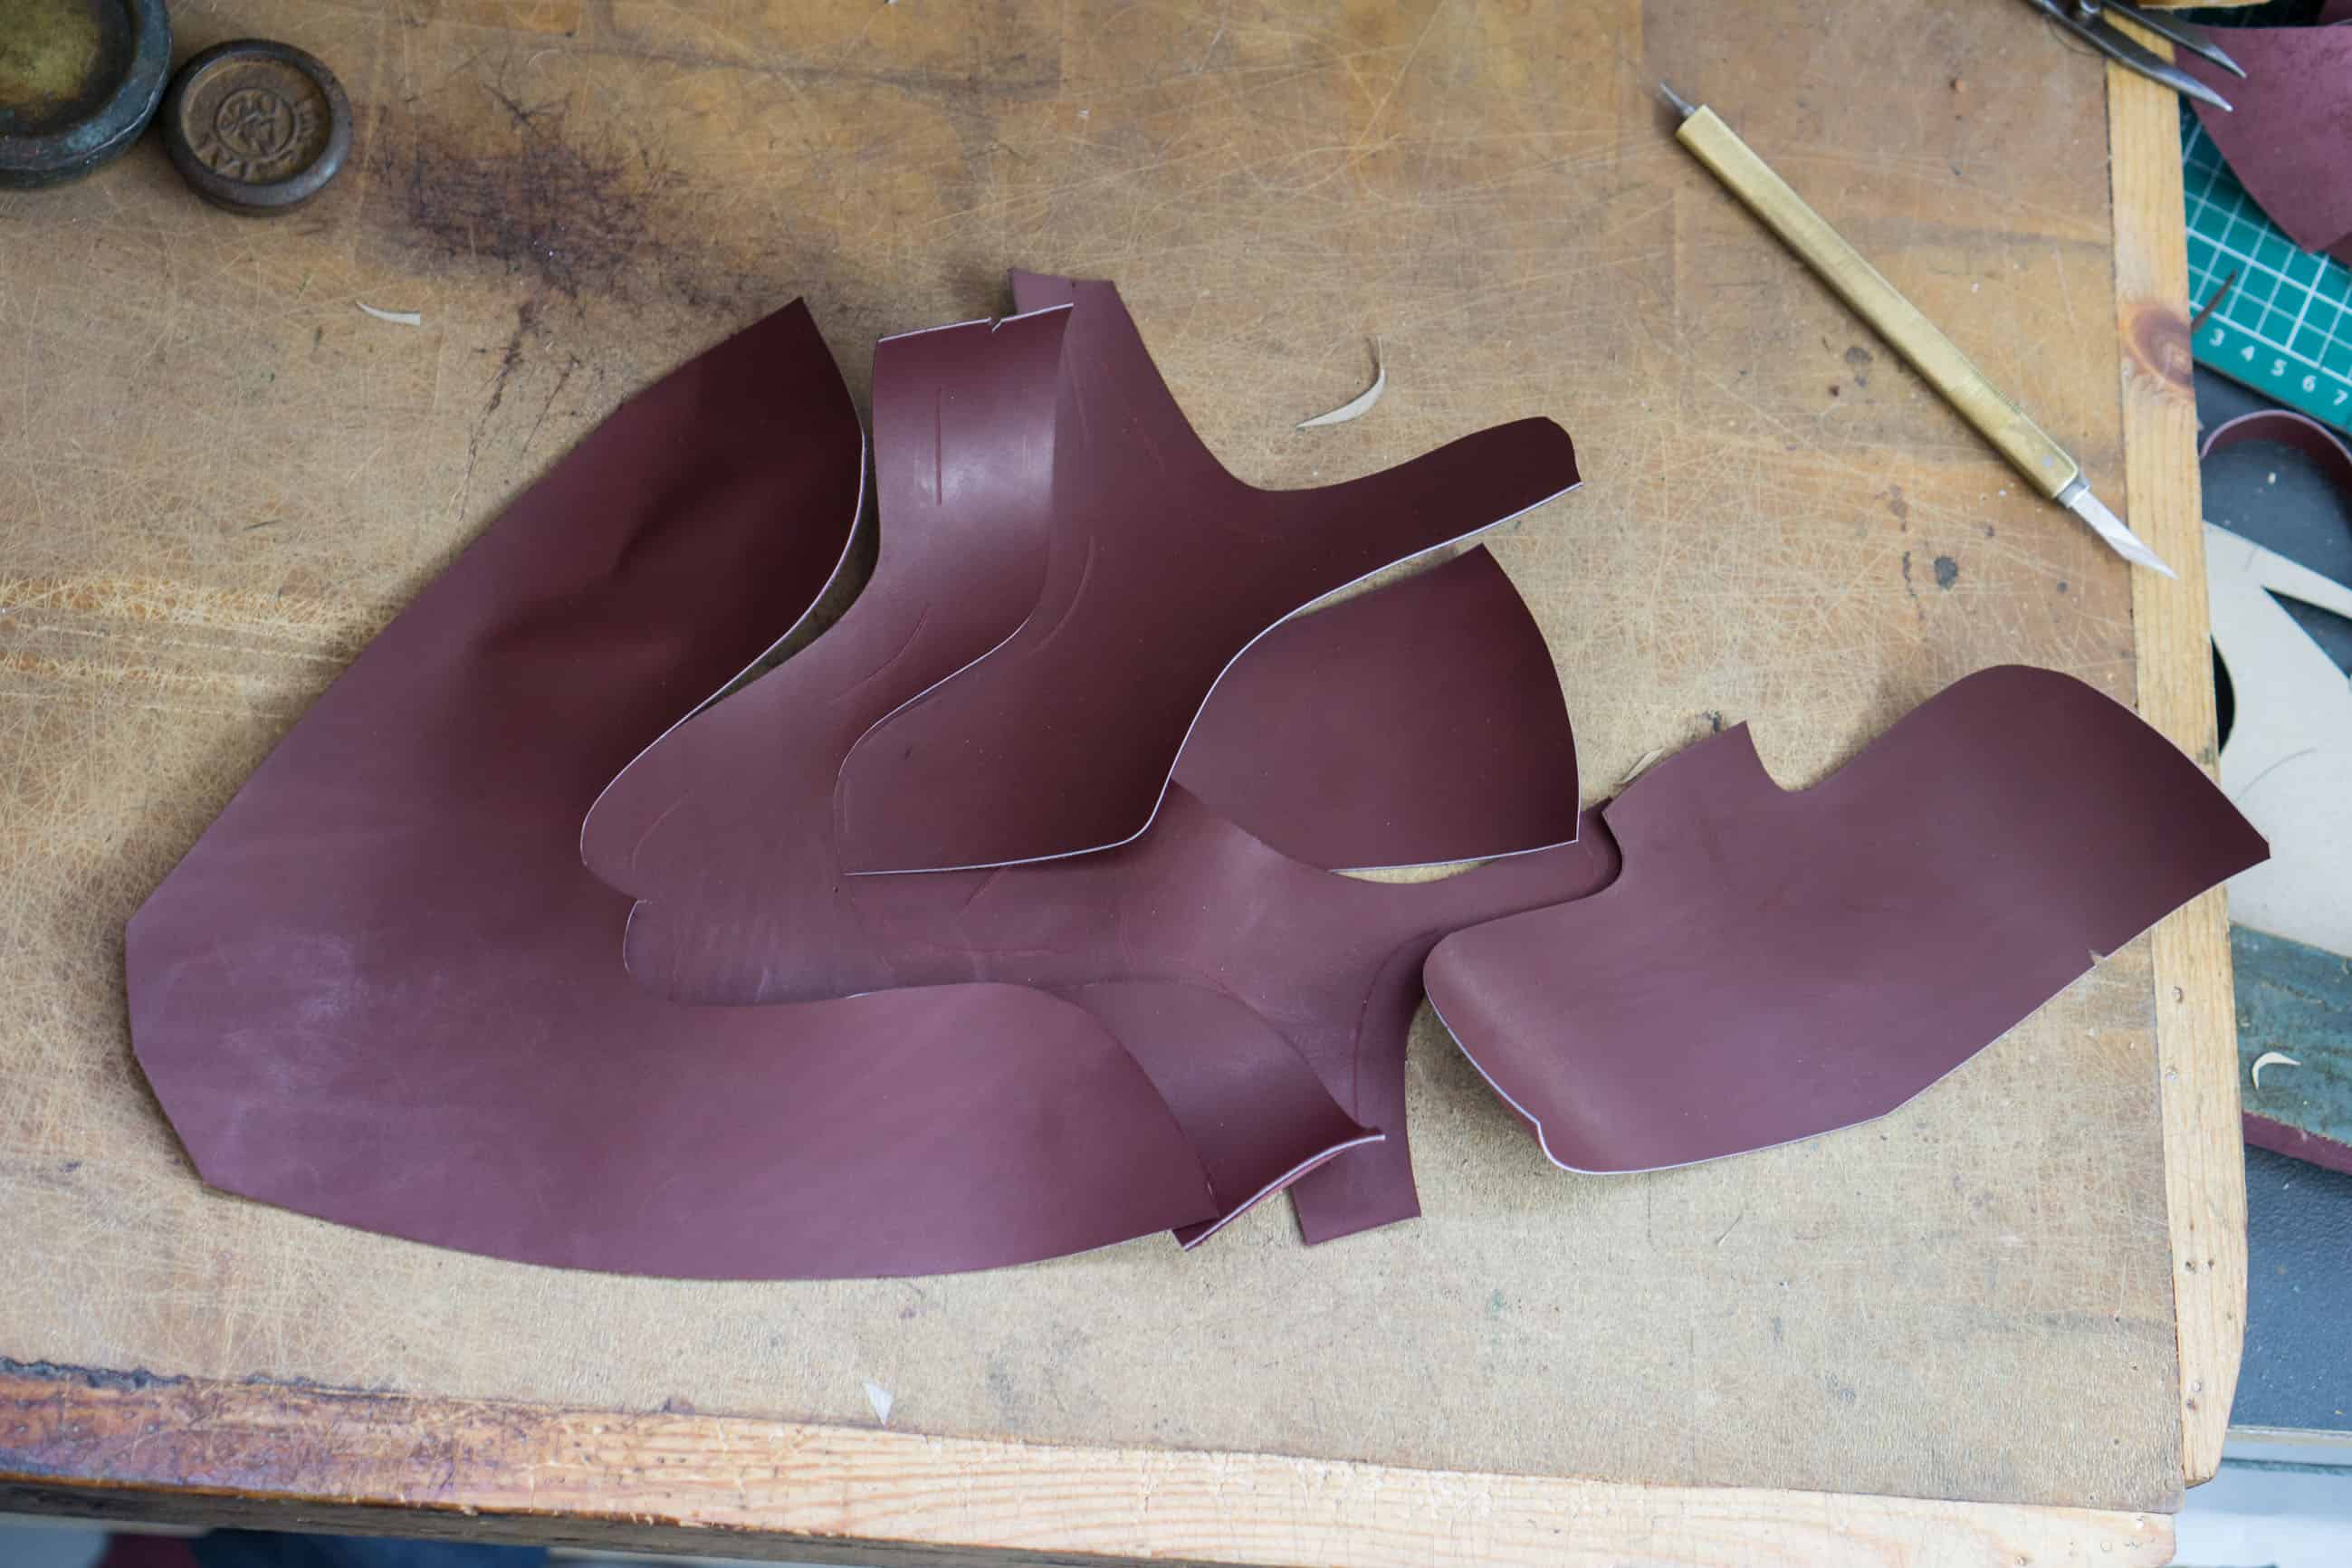
The parts of a shoe (minus the tongue) deployed in the best way. It’s this part above that is the complicated work for a clicker, to make the best use of the leather, the cutting of the parts is not as complicated at all. With my shoes the clicker only cut the parts roughly, then Daniel made the real cutting.

The part that is difficult here is that you always want to get the cut as straight as possible, which requires a good flow of how you move the blade and how you are moving the parts when it’s bigger turns or similar.

First the edges that will overlap each other is thinned out towards the edges on a skiving machine. Daniel Wegan feel that the result is smoother and better being made by the machine than when it’s done entirely by hand.

Machine skived.

The skiving is improved, however, by hand afterwards in the places where it’s needed.

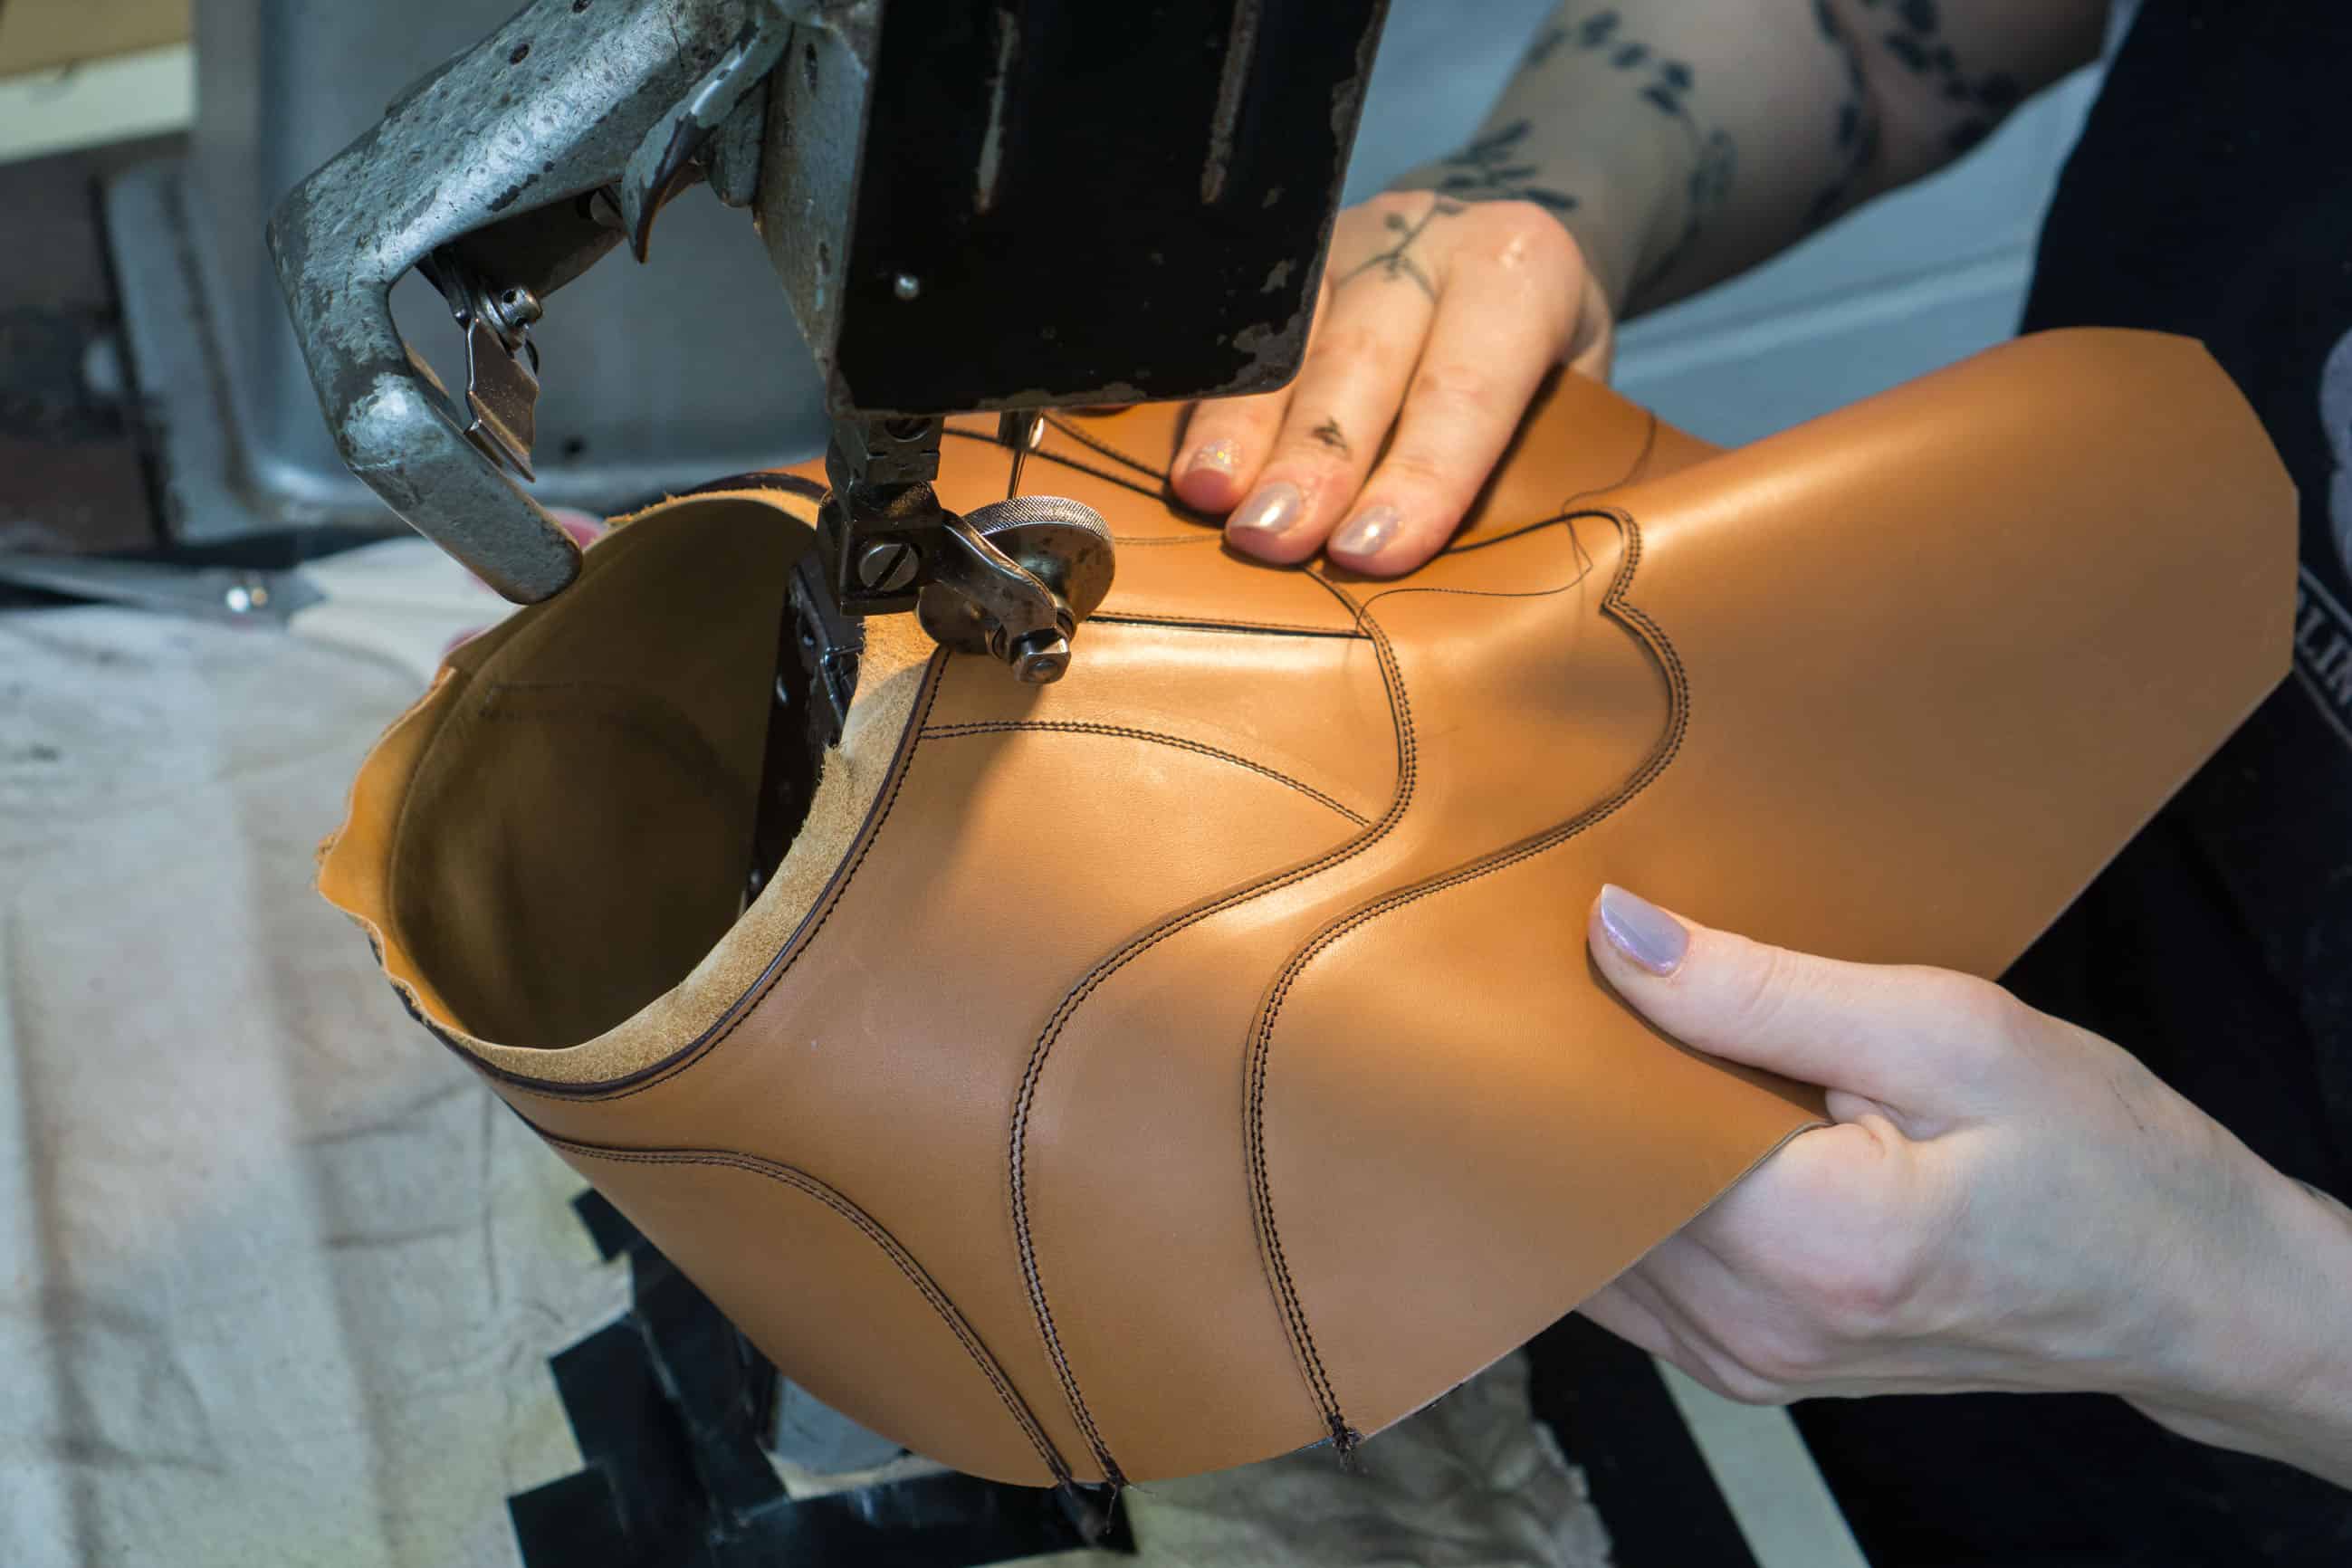
Now the parts are handed over to Gaziano & Girling’s Head Closer, Kay. First she paint the edges with the leather dye, since the leather as apparent above is not dyed through and to paint now is the best way to ensure that the edges are covered properly. Subsequently, the parts are put together one after another, first with glue which makes it easier to stitch, then with the sewing machine, and various reinforcements are fitted. Here it’s a reinforcement tape to prevent the opening to stretch that is attached.

At the sewing machine. I chose a double row of stitches but without gimping (the jagged edges that are common on shoes with brogueing), and since I was there in person now I could also choose things like what kind of reinforcement to be made at the opening, where I chose piping, and how much it would show.

Uppers finished closing. Daniel Wegan specs the uppers for the bespoke shoes different than the company’s RTW shoes. For example, less fabric reinforcements is used at this stage, instead he puts in leather reinforcements later on, and the tape out at the edges is to give strength for when the upper is being lasted.

The liner is on the bespoke shoes generally made of one piece of leather, to minimize edges inside the shoe. However, that makes it a bit trickier to fit in.
Here the lining is stitched to the upper, which is always what the seam in the top of the opening is for. The lining will then be trimmed down and opened up at the facings, while being kept at the heel area since it’s good to have to work with later on when the shoes are being lasted.

The shoes will have a dark brown patina, and to avoid smearing of the lining the tongue is painted before the closing.

The uppers are finished. The tongue is sewn just in the lining, also with a seam on the side a bit up to prevent it from moving. The dark spot that’s visible at the bottom of the tongue on the lining is the reinforcement stitches where the ends are burned away so that they won’t cause discomfort.

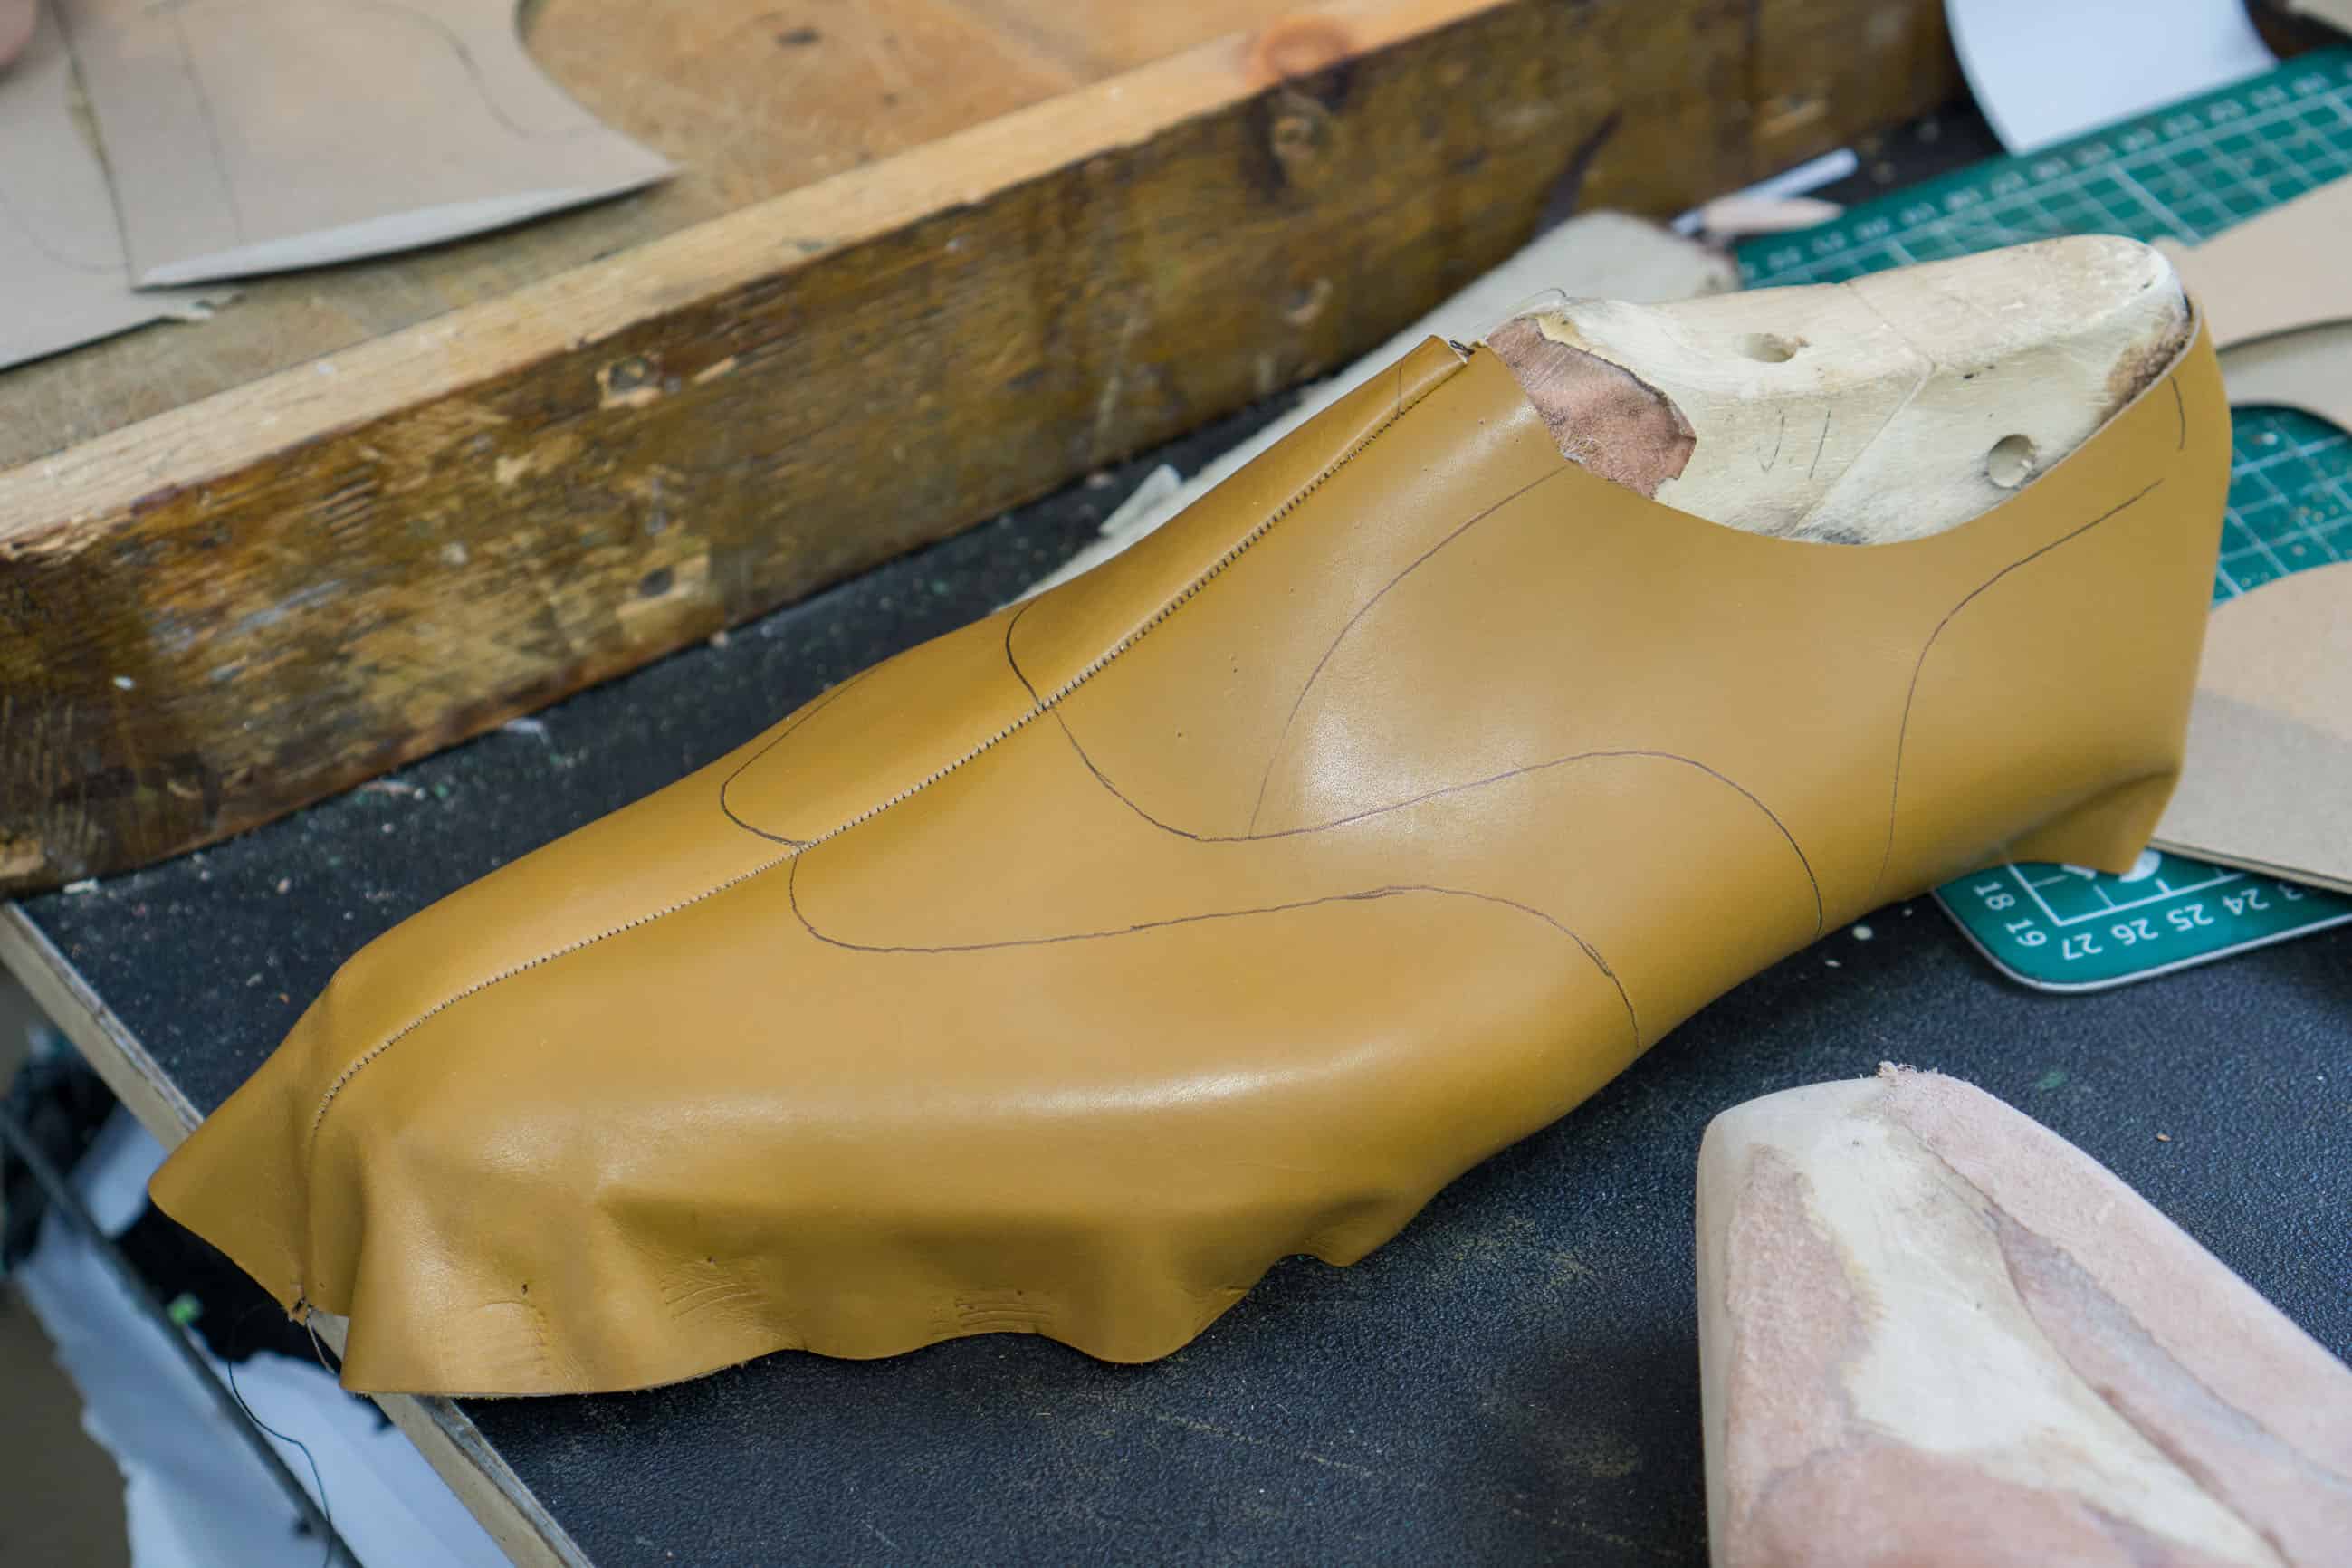
Now the upper leather is sprayed with a mixture of water and softener, to spare the leather as much as possible during the lasting.

Daniel Wegan is lasting the upper. In the background is Andreas Reijers, the second Swede at Gaziano & Girling’s bespoke department.

This lasting is only on a provisional basis to ensure that the uppers really fit and to let them shaped a bit after the last.

The insoles has been blocked on the last at an earlier stage, the thick vegetable tanned leather is soaked completely and trimmed roughly, attached and left to dry on the last to gain the correct shape.

The edges are trimmed closer.

Now the holdfast will be cut out, to which the welt seam will be made. First the outside is prepared.

Then the inside. Since the plan is to make a relatively narrow waist the holdwast is very tight at the waist area. Since a blind welt also will be made at the waist, it in itself means that the welt needs to be placed further in since it’s going to be covered by the outsole.

Daniel then make mark for each hole, extra carefully at the toe, which is the weakest point. Then he takes an awl and pre-punch the holes.

The next step is to prepare the heel stiffeners. Large leather pieces, the same material as the insole, is split, skived, rasped, glassed and sanded to the desired size and thickness, a time-consuming operation. Here is one almost finished while the other is just cut out. The stiffeners will go from the outside all the way through the arch on the inside, almost up to the inner ball of the foot. It’s about twice as long as regular heel stiffeners for RTW shoes.

Tested on the last.

The heel stiffeners are brushed with paste, which is also brushed between the upper and lining, then the stiffener is set in place.

Next lasting is definitive, so to speak, so now the last is powdered to easier slide out when the shoe is finished.

First Daniel last the back temporary, since he knows that the stiffener tends to slide down a bit, then he releases the nails, fix the stiffener and makes the final lasting. When the paste dries the stiffener hardens. Here you can see how what was left of the lining is used to have something to easily pull in when placing the upper.

Lasted a first round. The leather is hammered and pulled right so that there are no folds remaining, and when it’s done perfectly there will be a tighter line of nails than it is here.

Now time for the front part of the shoe. Here’s what will become the toe stiffeners, which will be prepared in a similar way as the heel stiffeners.

Here the lining is already lasted, now the toe stiffener is pulled in place, it’s pasted on the inside.

The fibers of the stiffeners is compressed. You want it to be strong and durable, while still being thin. At this time the stiffener is still damp, to help the lasting, and the shoe will now rest a bit to let the stiffener dry before the upper is lasted.

When the stiffener is dry it’s sanded to adhere better with the paste.

A clever tool to verify that the toe shape match between the shoes. It’s used both when the last is made, and now whe the toe stiffeners is put in place to ensure that they are equally thick and the shoes will get an identical toe shape. First the tool is pressed onto one toe, then turned and compared on the other, and any differences can be corrected. Eye measurements are not completely reliable, and with the toes you want to be absolutely sure that they are correct.

Side backers is made of a thinner leather than the stiffeners. It’s a tedious process to get them nicely thinned out towards the edges and the surface right so it adheres well, everything so that they shouldn’t be visible on the finished shoe.

Being put in place (it will be trimmed more).

Now the stiffener is pasted on outside and it’s time to last the upper as well properly here in the toe. Daniel Wegan tape the back part of the stiffener for it not to come paste there, this means that the transition from the toe stiffener becomes softer and there is less risk that it pinches here.

Creases worked away during lasting.

When the whole shoe now is lasted it’s again left to dry a bit. It can be difficult to get the vamp to lie flush with the last since the last has a concave shape here. Therefore a leather strip is stretched over this part to press the upper to the last.

Time for the welt seam. The material for the welts is split down to become a bit thinner.

Two welts are cut out and prepared in various ways. Here a small channel where stitch will be is carved out.

The extra leather is cut away for it to be clean and neat before the welt stitching is made.

A mark is made on where on the outside the awl to should come up, to help for the seam to become neat and tidy.

Before the hand welting process the shoe is covered by a protective plastic, both to protect from tools that will now begin to work on the outside of the shoe in a different ways, and also against splashes of paint and wax that will later be used on the sole and heel edge. Before the wrapping the shoe is washed clean with a sponge dipped in spirit, so no dirt is allowed to sit and fester under the plastic.

Daniel Wegan uses a linen thread for the welt stitch, where eight thinner threads are twisted together using pitch, so that it becomes strong and durable. The pitch also makes the thread stick very well, and not likely to come loose even after years of strain.

Hand welting. As mentioned, the toe is the most sensitive since the stitches becomes quite tight here, therefore it’s reinforced with an intertwined thread on the inside of the holdfast in this area. Although Daniel made holes in advance it’s necessary to use the awl to get the needles through in a good way. As needles he’s using fishing line.

When the welt is attached it’s trimmed closer to the upper. As apparent first a pencil is used to mark it. At the waist, the part that will be hidden by the sole when a blind welt is made, Daniel is cutting of much more of the welt.

The welt hammered even.

After the hand welting is finished. At the back the same type of stitch as elsewhere is used only without the welt. Note how little of the edge that is left at the waist, but it’s well enough to sew the sole stitch here. Since the stitches will be hidden under the outsole it doesn’t need to be especially tight and neat here.

In order not to have any unnecessary cavities the back of the holdfast is filled with a thin strip of leather.

The shank that will make the waist stable is usually made of metal or wood, sometimes leather. For different reasons Daniel Wegan prefers metal, but a drawback is that if it comes loose a bit it can start to creak. To avoid this, the shank is taped before being cemented in place

Shank cemented and the a first part of leather covering it is to be made, this will also strenghten the waist further and enhance the bevelled shape. Daniel is drawing with chalk on the shoe to mark where the first piece of leather will be located.
Then leather is put on top of the chalk and bashed a bit, so he can easily see the area to be cut out.

Here the piece is cut out and provisory in place. At the front it’s the skived down for a seamless transition.

Another piece of leather is fitted, a little shorter one, here it’s was rasped and then grounded to the desired shape. When the waist is so slim, it would look weird if it would also be built up very high, so the bevel we choosed to do is a bit more restrained.

As bottom filling Gaziano & Girling use felt for bespoke shoes. The options that are usually used are either felt or cork plate, in certain cases, leather, which all have different advantages and disadvantages (cork paste that is most common in RTW shoes are not so common on hand welted bespoke).

The entire bottom filling is done.

Now for the outsole. Gaziano & Girling use oak bark tanned soles from the British tannery Baker. Before they are glued in place the edges is trimmed a bit.

The sole is also prepared in various ways before the attachment. At the waist it’s thinned out quite firmly towards the edges.

The thickness is controlled.

The soles are glued, on the edges and in the back a synthetic neoprene that’s very strong is used. In the middle under the felt where it is not the same need for very high adhesion, a bit less strong rubber based adhesive is used. It makes it a little easier to resole them. Note also that the outer edges of the back are not glued all.

As in almost all cases both surfaces to be assembled are cemented.

When the sole is fitted it’s hammered and pressed firmly. Here the waist is worked on to also get it shaped nicely.

A cut along the edges at the waist is made since Daniel Wegan will use waist iron which is quite sharply angled, so the waist is very thin towards the edges.

In the back at the heel area wooden pegs are hammered in to attach the sole to the insole. The two metal nails in the middle has just been placed there for keeping the sole in place when it was attached, they will be removed.

Now it’s time for the sole stitch which attach the welt and the outsole. An extra protective tape is placed along the edge.

The welt is marked where the stitches should be with a fudge wheel . I want, even though the shoes are pretty big, to have a quite tight sole stitch. The fudge wheel used is made for 12 spi (stitches per inch).

Daniel then marks exactly where the stitches is to be made, it is easier to get a smooth straight stitch this way.

Throughout the process the knives used are sharpened frequently. Good, sharp knives are a necessity.

The flap that will hide the sole stitch is cut up.

The channel for where the sole stitch will be is carved out.

Here the sole stitch at the waist is made. As apparent it’s very tight and little room here since an as tight waist as possible is to be made. Daniel here makes the holes from below to avoid getting marks from the awl in the upper, which is common when a tight blind welt is made. As mentioned the seam doesn’t need to be as precise since it’s going to be hidden, therefore it works to punch from below.

At the front, however, the awl goes in from above, and here’s the seam is considerably tighter.

In order to avoid the formation of folds when the flap is put down over the channel it’s pressed first without glue, and will remain so for a while.

Neat stitching.

Now the flap is turned up again, glued with the strong neoprene glue and then flattened out again.

Pressed and hammered out.

Gentle hits with the back of the hammer compresses the edges.

Sole edges trimmed.

The split lift which will form the base of the heel is prepared.

Fitted on the shoe.

The heel is then built layer by layer with leather pieces that are constantly formed to make the heel on the outside as straight and neat as possible.

Also the outer part of the heel is compressed with the hammer to make it harder. It’s made quite gently though, and overall Daniel use very little force in the making of the shoes. He does things smooth, soft and repeatedly, this way it’s easier to see what happens and don’t make any mistakes.

Another thing that is made constantly during the manufacturing process is that the shoes are compared with each other to be made completely identical.When the heels are fördigbyggda they may be under pressure overnight. Daniel Wegan based tabs with adhesive, it is less durable than glue but gives no white stripes, because he prefers it. However, used strong neoprenlimmet of the pieces at the bottom, then they must sit properly.

The top piece in rubber is attached.

When the heels are built they are put under pressure overnight. Daniel Wegan builds the heel with paste, it’s not as strong as glue but gives no white stripes, therefore he prefers it. However, the strong neoprene glue is used for the top pieces, since they must sit very tight. Each layer is also nailed.

The day after, it’s time to tidy it all up. Here he marks where the heel is going to end.

The chest is cut out layer by layer.

Heel and sole edges are filed, glassed and sanded with increasingly finer sandpaper.

Further comparison.

With a stitch prick he presses down between each stitch to tighten the sea further.

Then again with fudge wheel.

Trimming.

The waist iron shapes the edges at the waist.

Here you can see how sharp the angle is on the waist iron.

The shoeis at this stage completely built, it’s just cosmetics remaining.

The bottom of the heel is glassed and sanded down, since you want to remove the outer part of the grain that would otherwise easily crack.

I choose Gaziano & Girling’s standard decoration nail pattern in the heel, five. They are hammered in a bit, the head is cut off, then sanded smooth and hammered in the fully.

An iron is heated to now press in soap and water into the edges.

The edges are rubbed with soap. To go over the edges with this means that the fibers are compressed and any irregularities emerge and can be corrected in time. It also makes the irons slide easier.

Rubbing, rubbing.

Edge ironing of the sole edge. This is a little wider than the final edge iron to be used, since an upper rimwill be made later and then the will sole edge will be slightly thinner.

The outer portion of the grain is glassed away from the sole.

A scraper for access below the breast of the heel.

Sanded.

The sole is taped with masking tape to protect the edges when stained, and also when the patina will be made.

Sole edge dye is brushed on.

The paint is heated in with hot irons.

The rim on top of the welt edge is carved out. With the last edge iron it will be highlighted further.

Wax is rubbed on, also some regular shoe polish and some turpentine is added for this layer. Turpentine for everything to dissolve easily and go into the leather.

Heated in.

Also the top of the welt is waxed and a hot fudge wheel run over it. The wax is not just for aesthetics, it also protects.

Now time for the slightly thinner edge iron where you on the left side here can see how it is made in two stages.

The end result if done right looks like this. This small detail gives a neater impression of the sole edge, and is relatively difficult to do well.

Here are the decoration on the heel, the series of small strokes that nearly all classic shoes have.

The protective plastic cover is cut off. It’s made with a heated knife, both to easily cut off the plastic but also for the part remaining on the shoe to shrink in a bit and disappear.

Clean upper, even if it is light in color, thanks to the protective plastic.

Neus Benavent is the Store Manager for Gaziano & Girling’s Fagship Store on Savile Row in London, and is also doing much of their patina. She will paint my shoes in a dark brown patina they call Canyon. First she’s always testing the color on the inside back of one of the shoes, to see how the leather reacts. It’s also left to dry a bit so she can determine the leather’s characteristics.

Here’s the first base layer is nearly done.

A further base layer is made before this step when the shading is done and they start to get their final hue. All the time very little color on the brush is used, which isn’t even dipped into the paint but only takes dye from a paper towel as which has brushed it on there. It’s painted with small quick strokes.

When the patina is is done the tape is taken off from the sole and the neutral sole finish I want is to be done. It’s treated with a cream called gum which gives a hard, semi-gloss, neutral surface.

A dark edge along the bottom of the heel and sole is made, for a neater transition between the edges and the sole.

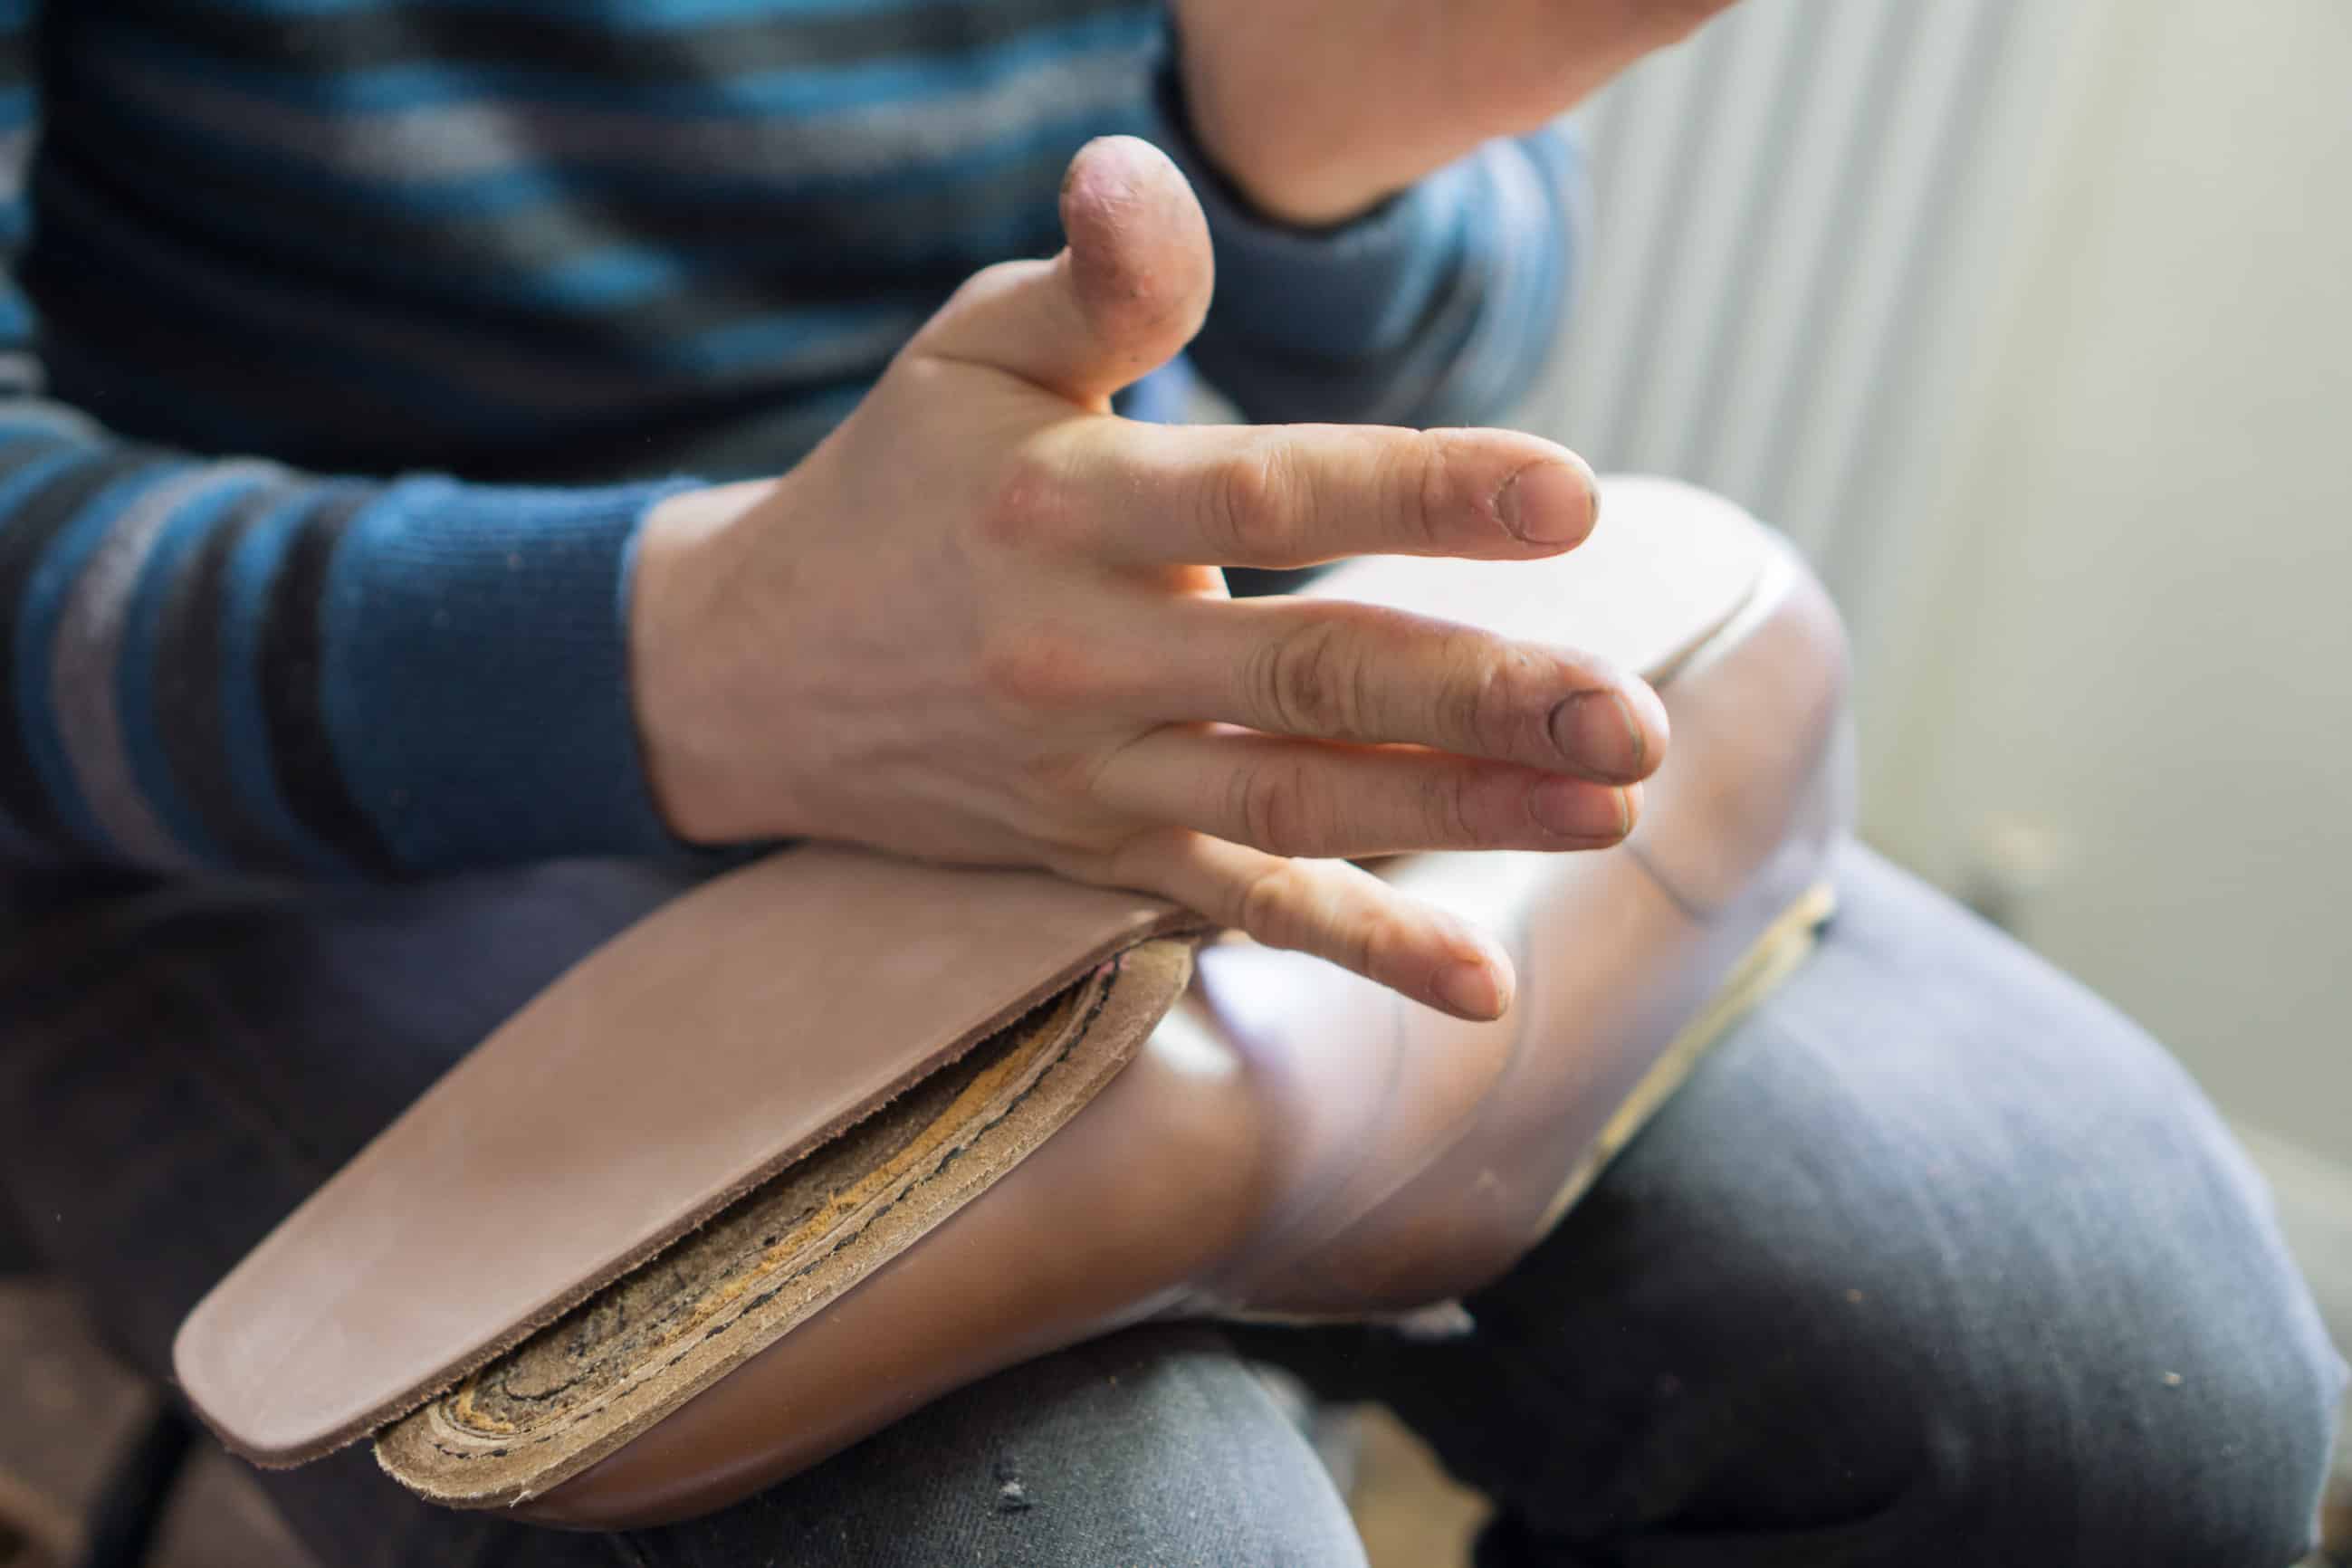
Then the shoes are polished with cream and wax polish. The lasts are pulled, a sock liner inserted, and also sunken toe taps are installed. After that the shoe are finished.
In a week or so the last post in this series will be published, with an extensive photo cavalcade of the finished shoes and a summary of it all.


One of the best and most comprehensive guides to bespoke shoe making, Bravo!
Great photo essay. Great shoes. Great technique all the way through
Peter and DWFII: Big thanks!
Without doubt the most interesting and informative review on shoe making I’ve ever read and most likely will ever read. An absolute credit to all involved
Well done Daniel and co, craftmansship as it best 🙂
Carl 1955: Thank you very much!
Janne Melkersson: Yeah it sure is!
Amazing report and thank you so much for posting ! It’s really incredible the work that goes in to a bespoke pair of shoes …
Amazing and in depth post.
Andre and Mark: Thanks a lot!
A very fine post indeed
“Now the upper leather is sprayed with a mixture of water and softener,”
@SHOEGAZING CAN U PLEASE WHAT IS THE NAME OF THIS SPRAY ???
What a great article congratulations to you and the legends Gaziano and Girling